Safety First!

Work on my comic is proceeding in a precessionary manner.

I’m in the middle of the coloring process, and it is going quite slowly. In the 10 mornings that I have worked on this book in April, I have finished coloring three pages. It’s a slow process.

For the first week and a half of April I was flatting the book, which was excruciating, until I got a tip to use the BPelt plugins, which sped things up a bit. Flatting was still a long process, even with the plugin, due to my sloppy ink work. I’ll tell you, I think I’ve learned as much about inking from coloring the book, as I have from the inking itself.

I’m not going to share the page I finished today, I want to keep some of the story under wraps after all.

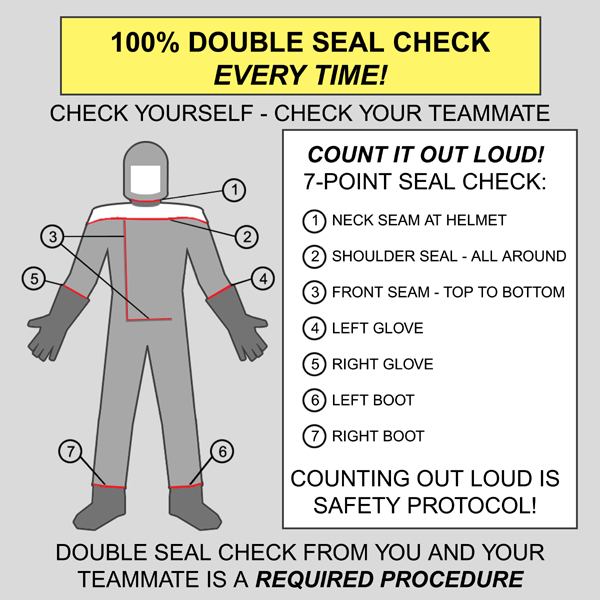
Instead, I’ll share this neat safety procedure that I had to whip up for the background of a couple panels.

Moon Safety

On the moon, safety is critical. If your suit has any leak in it, the suit will decompress, as will you.

Lunarch Corp does not want to lose any workers due to any sort of safety accident, hence the double check procedure. You check every seam in your suit, then one of your teammates checks all of the seams again, to make sure it is properly sealed.

100% Safety record is the Lunarch standard!

Moonside Seal Check Procedure

Safety Is Job Number One

Moon Bases

making more progress.

I’m neck deep in the coloring process, which is very time consuming and difficult. Color selection and color application are pretty hard to wrap my head around. I’m reasonably pleased with the results, but as always, have a long way to go.

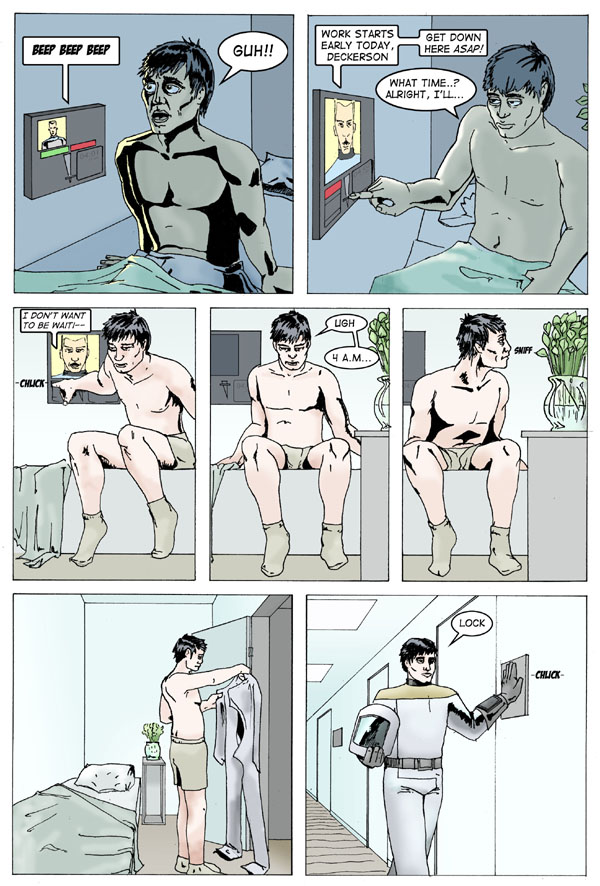
Here’s page 3:

Moonside Decision Page3

Page 3

I’ve been learning a ton as I go. Six pages to go.

Once More, With Color

You may remember my previous post showing off page 2 of the 8-page comic book story I’m working on.

I have it inked and lettered, but that means it is just black and white line art, with no color, light, shadows, or anything of the sort.

I started the coloring last week. It has been a long, painful process, where I have really learned that I hate coloring comics.

The show must go on though, and I finished coloring the second page today.

Here it is!

Moonside-Page2

Moonside, completed page 2

This is the last step in the creative process for this thing, and I will hopefully complete it in another week or three.

Page 2

Progress is coming along with the 8-page comic I’ve been working on.

The entire thing is inked and scanned, now it is a matter of doing all of the digital work that goes into a comic, the coloring, lettering, and digital processing. Once the page is drawn and inked, that’s only about half the work done, as I am finding out.

I’m heading down to Wondercon in Anaheim this weekend, and I’d like to have something to show my friends, so I’m lettering this thing up before I get to the colors.

It won’t be complete, but it will at least be a black and white version of the story, with all of the word balloons inserted.

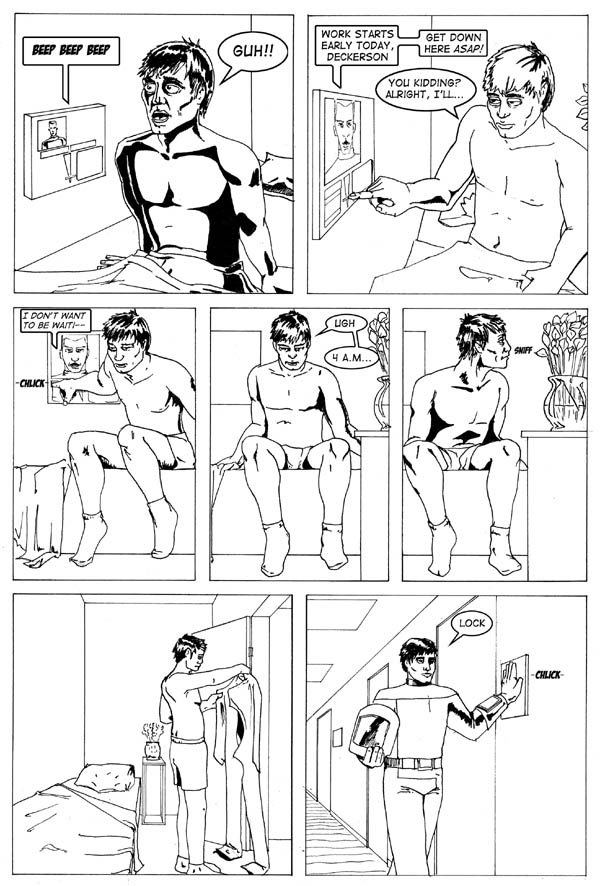
Here’s a preview:

Decision page 2 Sean Neprud

Page 2

I’ve got pages 1 through 3 lettered, but I don’t want to reveal pages 1 and 3 until the whole thing is ready to be read. I don’t want to give away too much about the story.

And for those keeping track, yes, the hour of Mr. Deckerson’s wake up call is a little shout out to my #HOVD homies.

More Moon Van

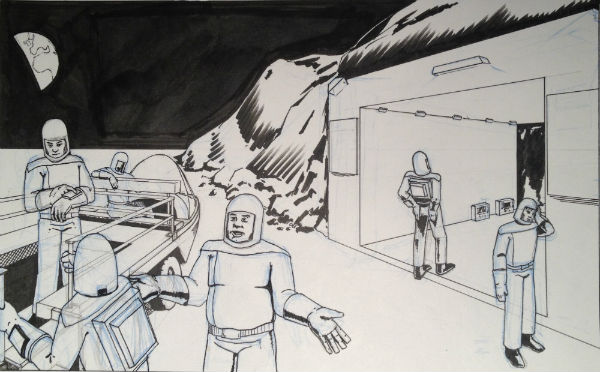
Commute’s over.

Get back to work.

Moon Van

More Moon Van

Still working on comics, it is going slowly, but steadily. This panel took me almost 3 hours to ink.

8 pages is the goal. 5 pages inked, 2 pages ready to ink, preliminary pencils done on the last page. I still have coloring and lettering to go when that’s all done too.

Making Comics

I haven’t made a comic book since I was 12 years old.

Something’s not quite right about that, so I’m fixing it.

Panels

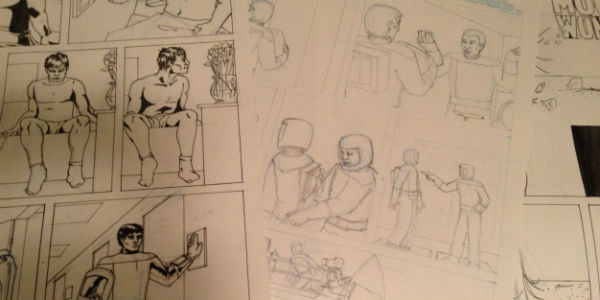
Comic book pages in the wild.

I decided I wanted to do this project last year, a little before San Diego Comic-Con. I go to Comic-Con every year, and every year, I leave both inspired to create something, and a little dejected, because I haven’t created something.

I decided last year that I would fix that before San Diego Comic-Con in 2013.

My goal was to get one page done a week. With all the extra set backs that are always a part of any project, I figured I could complete a thirty-two page comic in a year.

I started out strong, got one page pencilled and inked, and a second page pencilled. Then I sorta… fell behind. Stopped completely may be how some people would describe what happened.

About a month ago, I started up work again. Thanks to the #HOVD crew, I’m getting about a page a week done again. Four pages in the bag, with a fifth started.

(More on HOVD in the future. Short version: it’s amazing.)

I’m starting simple, an 8-page story. When I get that done, I’ll do another. When I get that done, I’ll do another.

These stories are sacrifices to the deities of comic creation, they are hungry for terrible pages by young artists, which they which to chew and grind, rend, and tear, until the artist stops creating terrible pages, and starts making good pages.

My story is about a guy with a lousy job, and his dreams for something completely different. To make it more fun and exciting, I set it in the future. On the moon.

I like the moon, after all. Who doesn’t. Plus, with it taking place on the moon, I get to draw cool stuff, like this Moon Van I drew this morning.

Moon Van

At least on the Moon the company gives you a ride to work

Yup. Pencil. White correction fluid. Coffee stains. Making comics is not a clean, tiny endeavour.

More coming on this in the (near) future, of course.

Sketchbook: No Direction

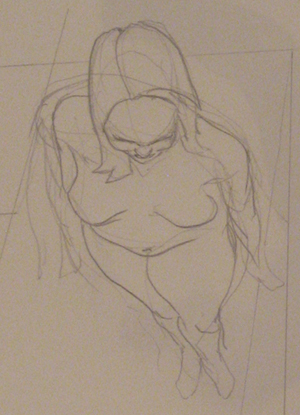
Sketch Study of Woman in perspective

Sketch of Woman in perspective

Direction is a strange thing.

Sometimes it’s there, and sometimes it’s not.

Lately, it’s been… not.

Usually I have the opposite problem: all direction, no time or energy. I still have no time, but I’ve had the energy, and I’ve been trying to figure out how to apply it.

When I start work on a new woodblock print, I know what the image is going to be. I always know before I even start drafting the image what it is going to be. My preparatory sketches are a chance to work out the details, but the main idea is there when I begin.

The imagery isn’t floating around my brain right now though. I’ve got the energy to carve up some blocks, but the usual imagery isn’t floating around up in my head.

When I get like this, the answer is just to start drawing. The image at the right is a little sketch to try to work out a seed of an idea. There might be a tree that can grow out of that seed eventually, but not now. I drew it to see if there was something in that image that felt right to me, something I would want to make a finished piece with.

There wasn’t.

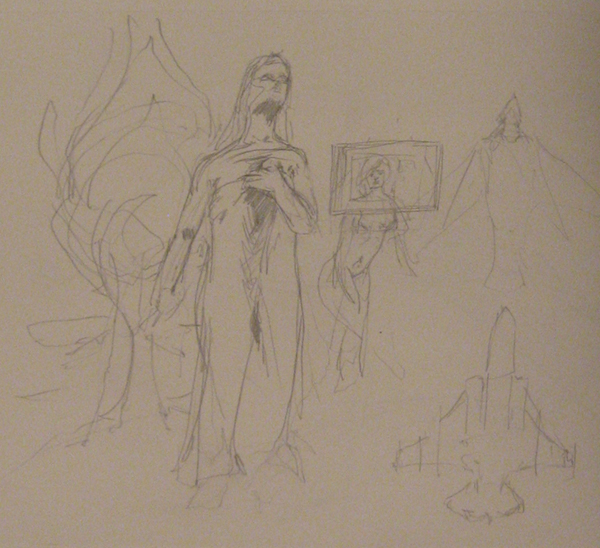
Below is a sheet from my sketch pad that is just a smattering of ideas on the same page. Nothing significant, just a few ideas to see if there is some imagery hidden in one of those ideas that I can extract for a print.

Sketchbook page

Depicting the regression to jets.

There was nothing there.

I’ve learned that when I regress to drawing jets, that the imagery I’m working with isn’t going anywhere.

Nothing wrong with jets, they just don’t sop up my creative juices in the way I am looking for.

Also, when I say “there’s nothing there”, what I mean is that the images in the sketches don’t hold any emotional resonance for me. They don’t make me feel anything, other than “that might be interesting”. To me, if “interesting” is the only emotion that an image evokes, that image is not good enough.

So, I go to an old stand by, I draw myself.

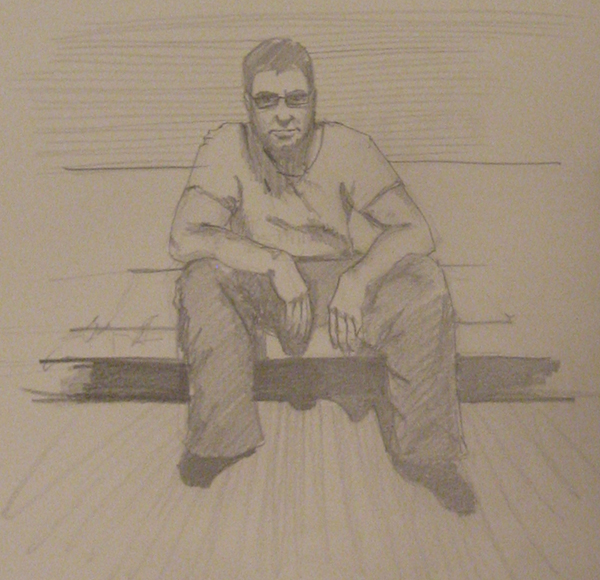
sketch of myself on a couch

Yours truly on a couch

This is a nice little pencil study, but there isn’t any juice in this. It may look ok, but there isn’t anything in this image that makes it interesting, or provides a vehicle for meaning.

This is gonna need more work. What do I do?

Actually, I do know what to do. This “woe is me, I am without direction” post is just a set up. I know exactly what to do, and I’ll let you know, just as soon as it’s done.

“Sunrise” Mylar Sun Print

I’ve been rattling around an idea for a while, ever since I first pulled a print on mylar.

I have been using mylar to transfer my key block onto other blocks, since the mylar, due to being plastic, doesn’t absorb ink like paper. I can print on mylar, and then press the printed mylar onto another block, to transfer the ink.

What I noticed, however, is that the mylar is translucent, and color on the back side shines through to the front. Even more, this effect is more prominent when the mylar is lit from the back.

I’ve wanted to take advantage of this for a while, and with a long weekend available, I set to work.

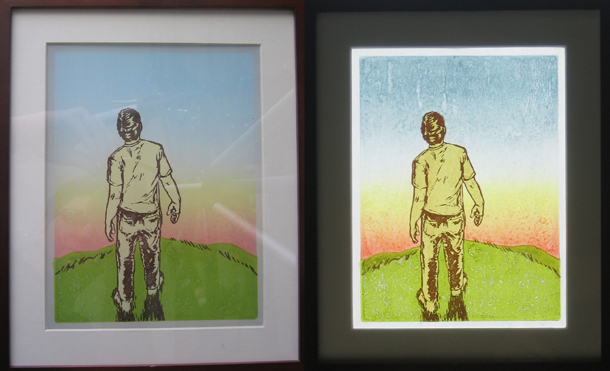
I came up with this: It is called “Sunrise”, it is an 8″x6″ woodblock and linoleum block print, printed on both the front side and the back side of the mylar.

Sunrise Woodblock Print on Mylar

Sunrise Woodblock Print , 8x6, on Mylar - Hanging on a wall (left), Hanging in a window (right)

The both of the images above are the same print, in the same frame. On the left, the print is against a wall, without any back lighting. On the right, the print is hanging against my window, with the sunlight coming in through the window behind it.

I am pretty happy with how these turned out. What I like the most is that the image changes depending on how it is viewed, and how it is lit. My thoughts about using mylar turned out to be true!

I’ll have these up for sale soon. Since proper presentation is an important part of this print, I want to find the best way to mat and frame these prints before putting them up in the shop.

And yeah, I want to make more sun prints.

The Working Dead

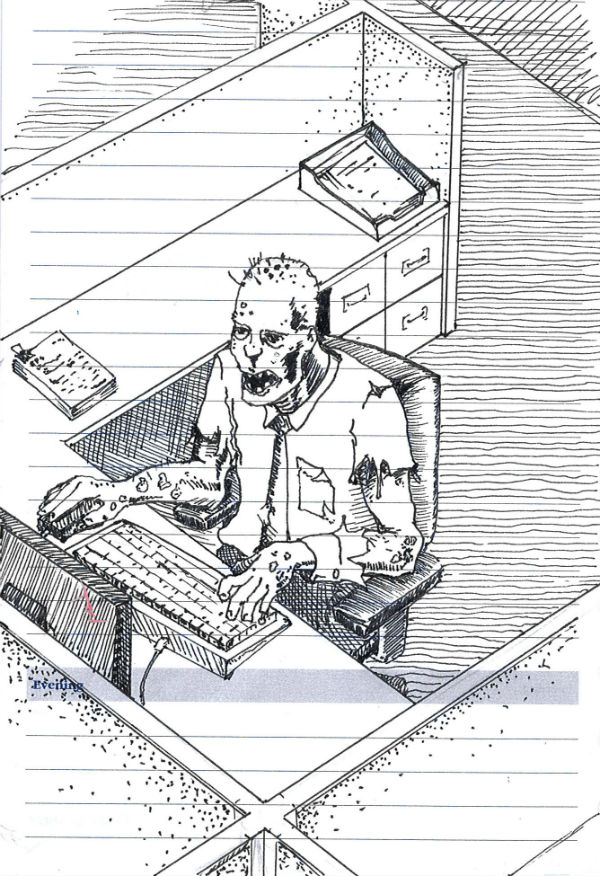
It might be a bit telling that during a conference call yesterday, I doodled this in my daily planner.

The Working Dead Ink Drawing

The Working Dead Ink Drawing

During the meeting I did a quick pencil doodle, and inked it in during my lunch break.

Let’s back up.

Yesterday morning, my alarm went off at 6:30 am, like it always does. In my haze of half-sleep, my first thought was, “why is my alarm going off on Saturday?”

When I realized it was only Wednesday morning, I thought something might be a bit off. I’m been pretty burnt out with the Day Job, and realized I needed a few days away. I looked at my schedule, and realized I could take a couple days off, and so here I am, resting up, and having a “mental health” day, as my Dad would say.

Also gives me time to post again here, and work on a “proof of concept” for an idea I’ve had brewing.

Oh, hey! Now things are looking up!

Direction III

Last week’s woodblock print, Direction III:
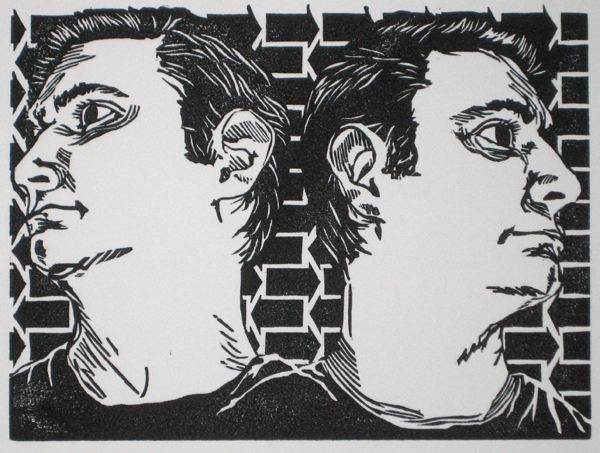
Direction III Woodblock Print

Direction III, Woodblock Print, 8"x6" image on 10"x10" Rives BFK

The alternate title for this print is “Who is that handsome men?”

Another in the Direction series of prints, which are all black and white, 6″x8″ prints. The direction series is about finding direction, or needing direction, or having conflicting direction, or something along those lines.

Honestly, a lot of time I don’t really know what the images I make are really about. Not exactly, at least. I have some feeling or notion that I can’t quite put into words, and so it ends up as an image.

I’ve been thinking about this notion of “direction”. I should have direction, I want to have direction. It doesn’t seem to always work out. This image is about wanting to move in a certain direction, the notion that things seem to halt moving in that direction, and that sometimes those things that put the breaks on a direction are external, and sometimes they come from myself.

got to self portraiting, not out of vanity, but because I was the only person here to use as a model for this one. Self portraits out of necessity.

A few technical notes

I was happy with the style in this print, I like how I was able to transfer illustration to the woodblock in a way that felt like I was still using my illustration style, and also using the nature of the woodblock.

When I draw, I usually use pencil, and end up with a softer line, and sometimes thin lines. That doesn’t transfer to woodblock, there are no soft lines, just the edge between the portion of the block that was carved, and the portion of the block that was not. This is a sharp line no matter how you carve it.

Also, the grain of the wood does not support a very thin line. The actual structural support of the wood I use breaks down with very thin lines, and when the line becomes thin enough, there isn’t enough wood left to keep the top layer of wood that accepts the ink in place.

I like how I was able to balance some line work with the needs of the wood to have a thicker line in this print. I may try to do some more like this.

A few production notes

This block took about 10 hours to carve, though this time may have gone quicker if I wasn’t having a bit of a James Bond marathon as I was carving this one. Carving the blocks is the least fun, most grueling part of this process, I usually have some sort of media going when I carve to entertain myself. I just got the last Ultimate Edition box set of James Bond movies, and decided it was the perfect time to work my way through them.

I was cleaning my apartment last weekend and found a stash of Rives BFK paper that I didn’t know I had. Rives is a heavyweight, bright white, cotton rag paper. It is really suited for lithography and etching, but I decided to use it for this print anyway.

After I tore the paper into the correct size, I put half of it in a damp pack (a stack of paper with dampened newsprint in between the sheets that is put under pressure to evenly dampen the paper). The dampened paper printed better, of course, as it usually does.

Ultimately, however, I think I need a press if I am going to keep this up. Right now I am printing by rubbing the back of the paper against the block with a large flat wooden spoon. It takes a lot of effort, and I still don’t get the ink transfer I want. I think a press would help with that, and speed up the printing process immensely.

For this week, I’ll be whipping out another of these “Direction Series” prints, don’t quite know what it will be yet. I need some time to sit down with my sketch pad and think it through.