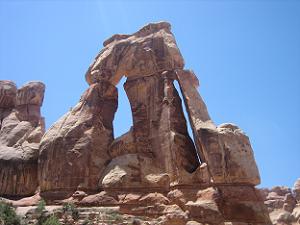
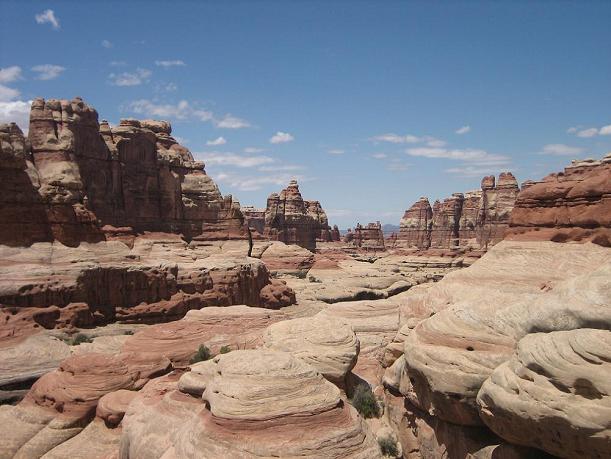
I’m working on a new woodblock print based on my destination at the end of Elephant Canyon: Druid Arch.
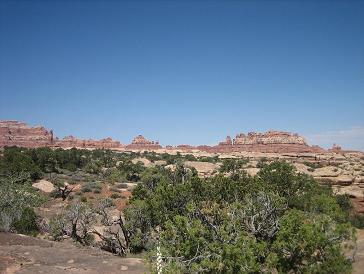
I was rather struck by this arch. To get to it, I had to hike through a canyon, then finally up a rocky hill. I scrambled up and over rocks to climb a couple hundred feet up the end of the canyon, before reaching a rock plateau that looked back on the canyon.
When I turned my head to the left, I saw this tall arch, standing 100 feet up in the air above this plateau. I drew this arch then, and I am printing it now.
The colors and shapes of the desert strike me the most. The rocks are large, massive, un-moving, yet arches like Druid Arch look fragile, like the slightest push could topple the entire thing. The rock edges are smooth in places, weathered by who-knows how many years of water and wind, yet in other areas the edges are sharp and hard, where the water worked its way into the rock, eventually causing it to break apart quickly and fiercely.
The rocks themselves are rich reds, oranges and whites, cut by the dark shadows against the rock edge. Most of all, the sky in the desert is blue. It is vibrant, and when I looked at the arch with the sky behind it, the blue began to vibrate and pulse with brightness and luminosity.
It is a challenge to capture the entirety of this experience in a small printed image.
This arch stands up above a rock plateau at the end of a canyon I reached 6 miles into this desert canyon. It stands about 100 feet tall.
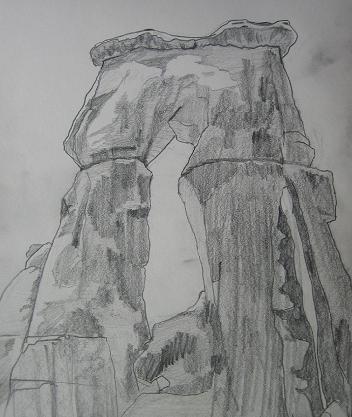
I sketched Druid Arch while I was out there, and I am developing this woodblock print from the sketch and from photos I took.
From the Grand to the Mundane
This weekend I found myself in the middle of process hell. I haven’t written much about process hell, but it is when my work consists of carving, mixing ink, rolling and printing blocks, making sure images register, cleaning up ink (and hands, and rollers), preparing paper, and other tedious bits of the printmaking process. All my work was printmaking grunt work over the weekend.
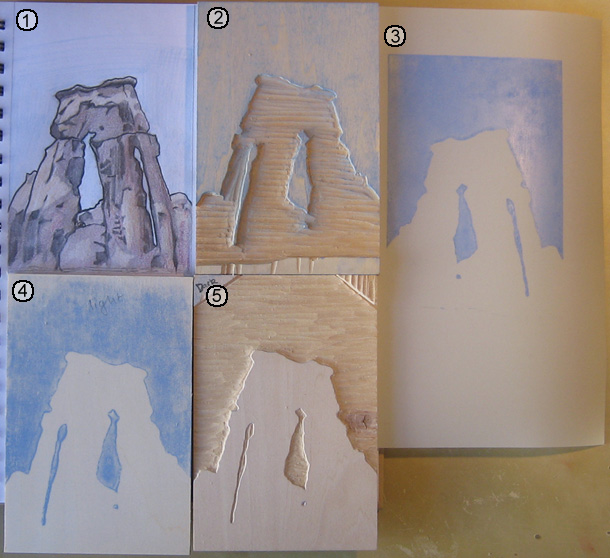
There was a bright spot, however. As I was working, I realized I was at an interesting point in the process that illustrates how a print is planned and how the image takes shape. I took a picture of the assortment of materials I was working with to show and describe to you. The numbered descriptions below the image describe each item in the picture below.
- Graphite and Color Pencil Sketch – Before I touch a woodblock, I sketch the image to solidify my plan. I started with pencil to get the overall shapes correct, then added color to figure out how many blocks I would need to do what I want. My plan is to use three blocks, one for the blue of the sky, and two for the arch. One block will print the light yellow areas in the sketch, another will print the dark areas shown in the sketch. The third color, the reddish brown color will be created by overlapping the two other colors.
- First Carved Woodblock – When I am satisfied with my sketch, I transfer the image to the first block. To do this, I draw a heavy line around the edge of the image with a soft pencil, my 6B or 9B. I then press the sketch against the woodblock, and rub the back of the sketch, making the pencil lines transfer to the block. The blocks that define the arch will be bounded by the blue of the sky, so I carved the sky first.
- Mylar Transfer Paper – After the first block is carved, I transfer the image to the other blocks. This requires a more precise process than when I transferred the sketch to the block (as described above). To achieve the required precision, I print the first block on a sheet of mylar. Mylar is a plastic, and the ink largely remains on the surface of the mylar (in other words, it adsorbs instead of absorbs the ink). I take a fresh block, align it with the mylar, and rub the mylar against the block. As long as I align the mylar with the block correctly, the result is a fairly precise transfer of ink from one block to another.
- Woodblock with transfered image – The process I described above results in a block with the ink from the first block transferred to it. I brush the block with Talcum Powder (i.e. baby powder, makes the block smell nice too). The talc absorbs into the ink, removing the tackiness, leaving the surface of the ink dry. This keeps me from smearing the ink and making a mess as I work on the block. You can see I wrote “light” on this block, to help me keep track of which color this block will print. This block will be the lighter color of the two blocks I print to compose the arch.
- Partially carved Woodblock – This block will print the darker of the two colors in the arch. I have carved away the area that will be printed blue, and I will carve away more from this block before I am done, to define the areas in the arch that will not receive the darker ink. When I finish this block, I will repeat the process of printing the image on the mylar, and transfer this image onto the second block (in number 4 above). The second block will then have the image from both of the other blocks transferred on to it, and I’ll be able to finish the carving process.
More Work To Come
The process is interesting, but tedious.
The most difficult part of the carving process is carving the second and third block, because these define the arch. The first block was fairly easy to carve, since it only depends on having the boundary of the arch with the sky defined. The success of the image will depend on how well the other two blocks work together to define the structure of the arch.
After the blocks are carved, the other challenge is picking and mixing the right colors to print. I spent the last week printing an edition of another woodblock print, only to realize, at the end, that I was unhappy with the color decisions I had made. I learned from the process, however, and I will be able to apply what I learned to this print of Druid Arch.
As of this writing, I have the second block carved and ready to print, I should be proofing this print later in the week, and start editioning the print this coming weekend.
