Posts Tagged ‘Color’

Safety First!

Tuesday, April 16th, 2013

Work on my comic is proceeding in a precessionary manner.

I’m in the middle of the coloring process, and it is going quite slowly. In the 10 mornings that I have worked on this book in April, I have finished coloring three pages. It’s a slow process.

For the first week and a half of April I was flatting the book, which was excruciating, until I got a tip to use the BPelt plugins, which sped things up a bit. Flatting was still a long process, even with the plugin, due to my sloppy ink work. I’ll tell you, I think I’ve learned as much about inking from coloring the book, as I have from the inking itself.

I’m not going to share the page I finished today, I want to keep some of the story under wraps after all.

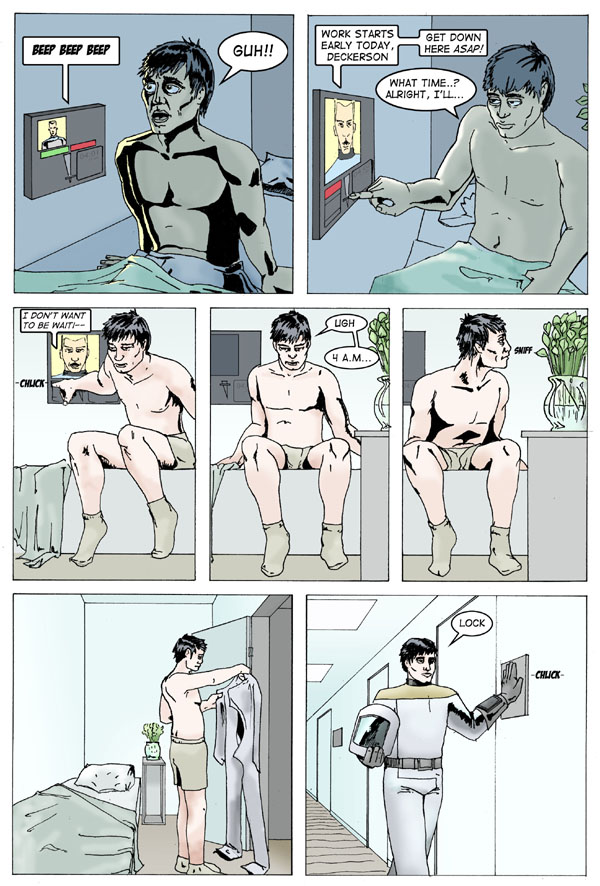
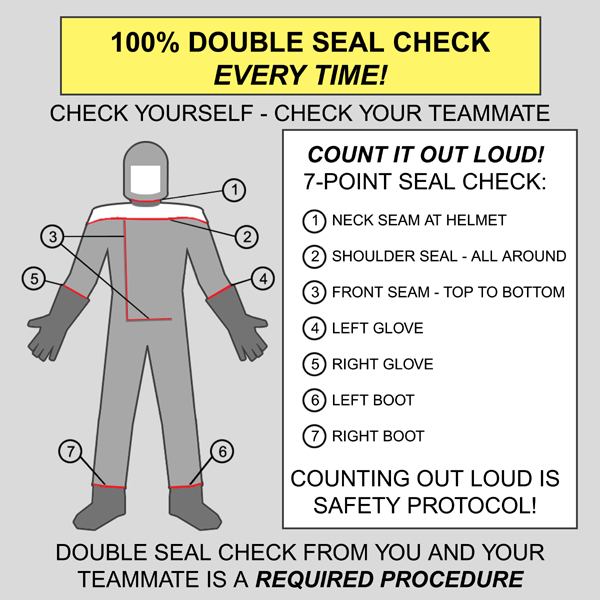
Instead, I’ll share this neat safety procedure that I had to whip up for the background of a couple panels.

Moon Safety

On the moon, safety is critical. If your suit has any leak in it, the suit will decompress, as will you.

Lunarch Corp does not want to lose any workers due to any sort of safety accident, hence the double check procedure. You check every seam in your suit, then one of your teammates checks all of the seams again, to make sure it is properly sealed.

100% Safety record is the Lunarch standard!

Moonside Seal Check Procedure

Safety Is Job Number One

Moon Bases

Thursday, April 11th, 2013

making more progress.

I’m neck deep in the coloring process, which is very time consuming and difficult. Color selection and color application are pretty hard to wrap my head around. I’m reasonably pleased with the results, but as always, have a long way to go.

Here’s page 3:

Moonside Decision Page3

Page 3

I’ve been learning a ton as I go. Six pages to go.

Once More, With Color

Wednesday, April 10th, 2013

You may remember my previous post showing off page 2 of the 8-page comic book story I’m working on.

I have it inked and lettered, but that means it is just black and white line art, with no color, light, shadows, or anything of the sort.

I started the coloring last week. It has been a long, painful process, where I have really learned that I hate coloring comics.

The show must go on though, and I finished coloring the second page today.

Here it is!

Moonside-Page2

Moonside, completed page 2

This is the last step in the creative process for this thing, and I will hopefully complete it in another week or three.

Druid Arch Woodblock Print in Process

Monday, June 21st, 2010

I’m working on a new woodblock print based on my destination at the end of Elephant Canyon: Druid Arch.

I was rather struck by this arch. To get to it, I had to hike through a canyon, then finally up a rocky hill. I scrambled up and over rocks to climb a couple hundred feet up the end of the canyon, before reaching a rock plateau that looked back on the canyon.

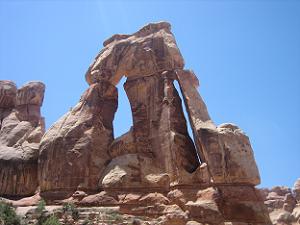
Druid Arch

Druid Arch, at the end of Elephant Canyon

When I turned my head to the left, I saw this tall arch, standing 100 feet up in the air above this plateau. I drew this arch then, and I am printing it now.

The colors and shapes of the desert strike me the most. The rocks are large, massive, un-moving, yet arches like Druid Arch look fragile, like the slightest push could topple the entire thing. The rock edges are smooth in places, weathered by who-knows how many years of water and wind, yet in other areas the edges are sharp and hard, where the water worked its way into the rock, eventually causing it to break apart quickly and fiercely.

The rocks themselves are rich reds, oranges and whites, cut by the dark shadows against the rock edge. Most of all, the sky in the desert is blue. It is vibrant, and when I looked at the arch with the sky behind it, the blue began to vibrate and pulse with brightness and luminosity.

It is a challenge to capture the entirety of this experience in a small printed image.

This arch stands up above a rock plateau at the end of a canyon I reached 6 miles into this desert canyon. It stands about 100 feet tall.

I sketched Druid Arch while I was out there, and I am developing this woodblock print from the sketch and from photos I took.

From the Grand to the Mundane

This weekend I found myself in the middle of process hell. I haven’t written much about process hell, but it is when my work consists of carving, mixing ink, rolling and printing blocks, making sure images register, cleaning up ink (and hands, and rollers), preparing paper, and other tedious bits of the printmaking process. All my work was printmaking grunt work over the weekend.

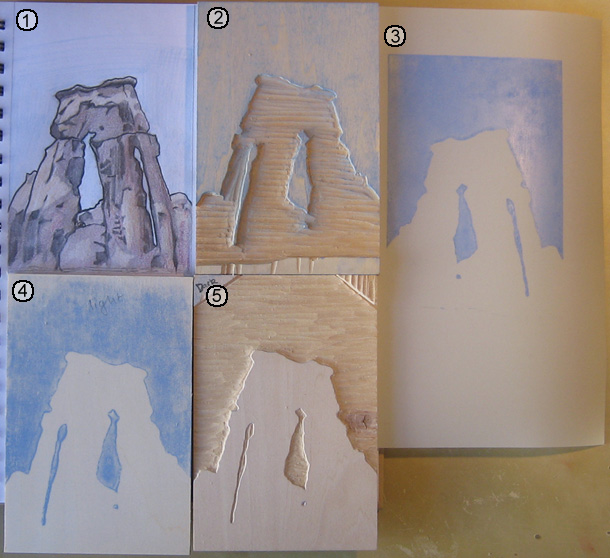
There was a bright spot, however. As I was working, I realized I was at an interesting point in the process that illustrates how a print is planned and how the image takes shape. I took a picture of the assortment of materials I was working with to show and describe to you. The numbered descriptions below the image describe each item in the picture below.

A Woodblock Print in process

A woodblock print in process of being developed (click to enlarge)

  1. Graphite and Color Pencil Sketch – Before I touch a woodblock, I sketch the image to solidify my plan. I started with pencil to get the overall shapes correct, then added color to figure out how many blocks I would need to do what I want. My plan is to use three blocks, one for the blue of the sky, and two for the arch. One block will print the light yellow areas in the sketch, another will print the dark areas shown in the sketch. The third color, the reddish brown color will be created by overlapping the two other colors.
  2. First Carved Woodblock – When I am satisfied with my sketch, I transfer the image to the first block. To do this, I draw a heavy line around the edge of the image with a soft pencil, my 6B or 9B. I then press the sketch against the woodblock, and rub the back of the sketch, making the pencil lines transfer to the block. The blocks that define the arch will be bounded by the blue of the sky, so I carved the sky first.
  3. Mylar Transfer Paper – After the first block is carved, I transfer the image to the other blocks. This requires a more precise process than when I transferred the sketch to the block (as described above). To achieve the required precision, I print the first block on a sheet of mylar. Mylar is a plastic, and the ink largely remains on the surface of the mylar (in other words, it adsorbs instead of absorbs the ink). I take a fresh block, align it with the mylar, and rub the mylar against the block. As long as I align the mylar with the block correctly, the result is a fairly precise transfer of ink from one block to another.
  4. Woodblock with transfered image – The process I described above results in a block with the ink from the first block transferred to it. I brush the block with Talcum Powder (i.e. baby powder, makes the block smell nice too). The talc absorbs into the ink, removing the tackiness, leaving the surface of the ink dry. This keeps me from smearing the ink and making a mess as I work on the block. You can see I wrote “light” on this block, to help me keep track of which color this block will print. This block will be the lighter color of the two blocks I print to compose the arch.
  5. Partially carved Woodblock – This block will print the darker of the two colors in the arch. I have carved away the area that will be printed blue, and I will carve away more from this block before I am done, to define the areas in the arch that will not receive the darker ink. When I finish this block, I will repeat the process of printing the image on the mylar, and transfer this image onto the second block (in number 4 above). The second block will then have the image from both of the other blocks transferred on to it, and I’ll be able to finish the carving process.

More Work To Come

The process is interesting, but tedious.

The most difficult part of the carving process is carving the second and third block, because these define the arch. The first block was fairly easy to carve, since it only depends on having the boundary of the arch with the sky defined. The success of the image will depend on how well the other two blocks work together to define the structure of the arch.

After the blocks are carved, the other challenge is picking and mixing the right colors to print. I spent the last week printing an edition of another woodblock print, only to realize, at the end, that I was unhappy with the color decisions I had made. I learned from the process, however, and I will be able to apply what I learned to this print of Druid Arch.

As of this writing, I have the second block carved and ready to print, I should be proofing this print later in the week, and start editioning the print this coming weekend.

Dispatch: Coloring Ductwork And Understanding Problems

Wednesday, April 21st, 2010

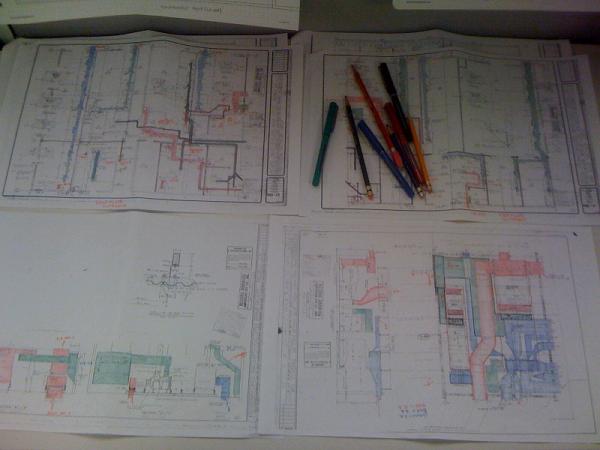
I got to work this morning and found this on my desk:

engineering drawings

Ductwork Layout in a building, color coded for clarity

Turns out I made this the day before. By the time I was finishing this, around hour 12, I wasn’t taking a bird’s-eye view of what I had done.

I got to work, saw it all laid out in front of me and thought it looked kinda neat. After all, it is kinda neat. My supervisor walked by this morning and said, “Ooooh, pretty”.

It’s ductwork. Pretty ductwork. Green and blue are supply ducts, Red is return and exhaust ducts.

The color coding helps me wrap my head around what is what. I’m retrofitting an existing building, and what I need to design depends on what is already there. It’s a lot to keep track of, color-coding helps me keep track of it. What you see above is one floor on one half of the building. It’s a big job. Sometimes it feels bigger than my mind.

I get sucked into this type of work. I can do it for hours on end.

It is soothing, in its own way. Each new duct I color in adds to my understanding. I assembled this puzzle in my mind throughout the day, adding piece after piece, until I understood how all the pieces fit together. I know what each piece does, and how the new pieces that I have been tasked with adding have to fit into this overall system.

Understanding calms me down. It helps me focus, and once I have understanding, I know how to proceed to complete the task.

Most problems have simple solutions, once you know what the problem is.

The tricky part, the part that may require days of coloring in ductwork, is fully understanding the problem.

Prints in Progress: Color Choice and Resolution

Thursday, December 31st, 2009

I have to think about color extensively as I am working on a print.

Yesterday’s post about color choice is continued in this post today. In yesterday’s post I mentioned how color can be used to resolve other colors together, and make them work well and look good together.

Examples of Prints in Progress

This print can easily be resolved with a darker green

This print can easily be resolved with a darker green

I have a few prints that are in various stages of completion, one of them has an obvious resolution, one is still making me think. In this section I am going to discuss how I think about color in these prints, and what I think is needed to resolve the colors I have printed so far.

The print on the left is waiting for 1 last color to be printed, and I think that it is pretty clear what that color should be. I plan to print a slightly dulled down (ie. less saturated), transparent forest green color. That color should make this image pop together.

The trick to this image is going to to find a color that is rich enough, but not so rich that it overpowers the other colors already on the page. The 3 colors on the paper so far are not strong in value and saturation, so a very saturated color might visually dominate these colors, and make them appear weaker, and lose definition. A strong color would draw all the attention, and the other colors would appear very gray in comparison.

A color without enough saturation, on the other hand, will make the entire image appear bland, and the definition will be lost because nothing will stand out. If the 4th color is as dull and grayed out as the first 3 colors, then the entire image will appear to be a dull gray mess, and nothing will catch the eye. Everything will blend together, nothing will be interesting.

A quick aside

I wasn’t going to discuss this in this post, but it came up as I was thinking about the above print, because I noticed another completed print that seems to contradict what I said above.

The vibrant dark green works because it is used sparingly

The vibrant dark green works because it is used sparingly

Interestingly, the issue of matching the value of the other colors is more and more of a problem when the area that ink will cover becomes larger and larger. In the previous example, the 4th block will cover a large portion of the paper with ink. This makes the color choice much more important.

If the block applied a smaller area of ink to the paper, then a color with a much stronger value could be used. The color will not overpower the others because there is less of that color on the paper.

The print on the left demonstrates how a stronger color can be used when used sparingly. The first four colors that were printed are all very close to gray, their value is all very low. A strong color could easily overpower all of these subtle colors.

I printed the final block, the little bits of definition of the leaves, with a very saturated green color, straight out of the ink can. I didn’t thin the ink or mix in other colors to tone down the vibrancy of the color.

This choice worked well for this image, and the small, vibrant bits of color make the image come to life in a way that it didn’t before this vibrant color was printed. If the final color covered more of the paper, however, this strong green color would start to overpower the rest of the colors because it would become too dominant.

The fact that there are just very small bits of this color allow me to use a color so vibrant.

Back to the Regular Program

The last block I have to discuss today is another print that is in progress, and that I have created a bit of a problem with.

These two colors will be difficult to resolve

These two colors will be difficult to resolve

The block on the right has only the first 2 blocks printed, but I used 2 very different colors on this print so far. The light blue, and the dirty orange color do not look very good together as they are. A third color is needed to tie everything together, and visually connect these two colors.

Even though these two colors are not that saturated, they look more saturated than they are when placed together. The blue and the orange are compliments (opposite on the color wheel), so they make each other look brighter. Because of this, I will have to mix a color that is a little more saturated than I might guess, because I have to match the apparent saturation of these colors, rather than the actual saturation.

I’m not sure exactly which color I will print on this block next, but it will probably be in the brown family. The trick is going to be to pick the right shade of brown to make these two colors come together. It would be just as easy to mix the wrong color brown as it would be to mix a color that makes the blue and the orange look good.

Last Thoughts

It turns out that I think about color a LOT. Color choice is usually the most difficult part of the printmaking process for me.

If you missed yesterday’s post, click here to check it out. Leave a comment below and let me know if this was interesting, confusing, or anything alse.

Case Study: Saturation, Value, and Matching Colors

Wednesday, December 30th, 2009

I create a lot of problems for myself that I later have to fix.

A lot of those problems have to do with color.

The 101 Woodblock Series project is largely a design project. I formulated the idea for this project when I was still thinking a lot about design, rather than art. That influence has found its way into this project. Most of the thinking and artistic consideration that goes in to each print has to do with balancing color and shape in a way to make a pleasing image.

Most of the prints have 4 or 5 colors printed on them, which requires mixing a lot of colors, especially considering that each of the 101 prints is different.

The trick is to get all of the colors to work together.

Sometimes, everything works out, and the image just comes together. The colors work together well, and the resulting image is rather… pleasing.

Much more frequently, I create a bit of a “challenge” with the first 2 or 3 blocks, and have to figure out how to fix this “challenge”.

In the challenging prints, the colors don’t quite go together, and the image does not look complete. Often a final color is required to make the disparate colors come together and look good. I think of this as “resolution” of the colors, with “resolution” used in the sense of “resolving” things.

Resolution explained with Music

In Music Theory, Resolution refers to the part of the music that brings everything together, and makes the piece of music feel like it is complete. It is the final note that makes the piece of music complete.

Technically, Resolution is a change within the music from dissonance (sounds that don’t sound good together) to consonance (sounds that do sound good together).

The parallels to printmaking are that I often have to find a color that makes all the previous colors – which don’t quite look good together – fall in to place and look good.

Before going on, I want to show you, with music, what resolution sounds like. I picked part of The Four Seasons, by Vivaldi, to demonstrate Resolution.

This audio file has the very last chord edited out, so that it is unresolved. Take a listen.

Vivaldi Unresolved:


Without the final note in the piece, it feels like everything is left hanging, it is unfinished.

Compare the above to the following audio clip, which is the same music, but with the ending chord left in.

Vivaldi Resolved:


The last chord completes the music, and makes it sound finished. Everything that came before it works together as an overall piece of music, when the last note is added at the end to resolve the music.

Resolution applied to color

I often find myself in situations where I have to pick the right color to visually resolve the colors I previously printed. The colors on the paper up to that point don’t quite work, don’t feel complete. I have to think about what color will tie all the others together, just like the last note in The Four Seasons ties that piece of music together.

I’d like to take you through a brief color imagination experiment:

Imagine something purple. Not bad.

Now add some orange next to it. Not good.

Orange and purple have a natural dissonance them. They don’t look good together. It is difficult to find a 3rd color you can add to these 2 and make the combination look good. It can be done, but it is a challenge (hint: the color that can do this begins with “green” – click to read why*).

Now imagine green and blue together. These colors usually look pretty good together, because they are close in hue. Another color is needed though to make these two colors really pop, other wise they may look fairly drab together. Because they are so similar, the combination of the two can be boring. A small bit of red, or a red-orange color may make those colors really look good together. A neutral color, like brown or gray, can also bring these colors together. Since blue and green naturally work well together, they are easier colors to resolve with a 3rd color.

Examples from Complete Prints

I recently finished a batch of prints, some of them resolved well, some of them did not. In this section I will explain which I think resolved well, which did not, and why.
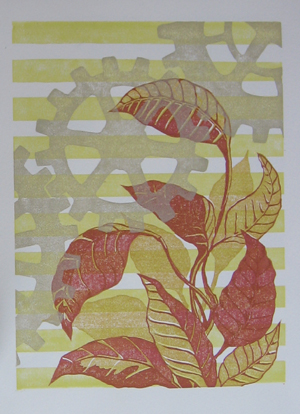

The challenge is to find a color to match the warm oranges and reds

The challenge is to find a color to counter the warm oranges and reds

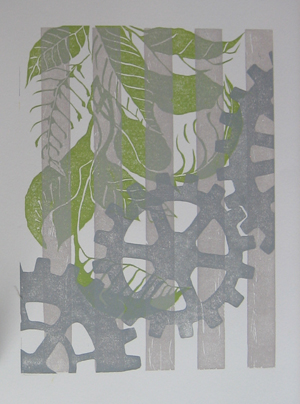
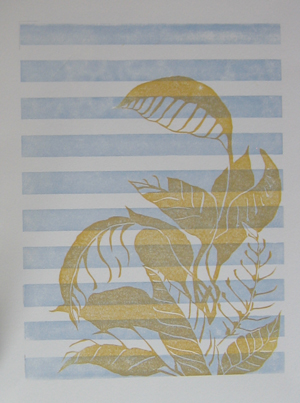
The print on the left surprised me. I started by printing the horizontal stripes, and then the 2 blocks for the leaves. The result was a very vibrant image full of warm colors, yellow, orange, and red. I like the vibrancy of these colors, but I knew that I needed something else to counter the warmth.

Without something to cool down the image a little bit and pull back the warm colors, this image could be too vibrant, to the point that it is difficult to look at. In fact, you can see the print as it looked with just the 3 vibrant warm colors in this post: Weekend Printing Results.

The warm colors in this print are similar in value and hue, and the image gets lost in a sea of orange. This image required a 4th color to resolve the previous 3.

My first thought was to put a cool color, like a blue or a green in there, but after thinking about this, I thought that a cool fourth color would stick out too much, and the image would be a visual game of “one of these things is not like the other”. I took a gamble with the gray color I printed the gears with, and I think it worked out well.

The gray color I printed has a touch of yellow and green to it, and has almost a “cool golden” color to it. The touch of cool that the image needed was added, but with a toned down, grayish hue, so that the value of the cool color did not contrast too much with the overall warmth of the image. The warm vibrancy of this image is something I like about it, and I did not want to counteract that, I just wanted to cool it down a little so that it wasn’t overpoweringly vibrant.
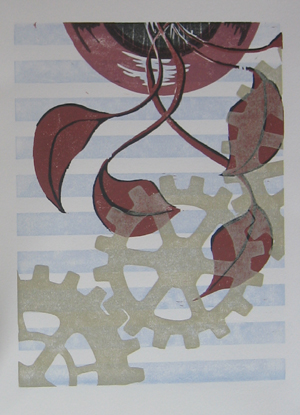
The same color used before did not resolve the colors in this image

The same color used before did not resolve the colors in this image


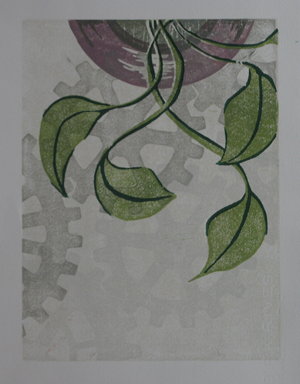
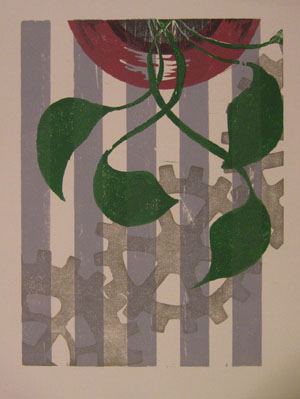
Contrast the use of the “golden gray” color above with the use of the same color in the image at right. In this one, the golden gray color does not resolve the colors in the image, and in fact, makes the dissonance between them worse.

The use of the color for the gears in this image, was, I believe, a mistake.

This image was difficult to finish because I created a visual problem when I printed the first few colors. I like the red in the leaves and the pot, and I like the light, slate blue of the horizontal stripes, but together, they look bad. They have very little in common, and adding the last color of the gears made it worse.

I am still not sure what color would have made this image work, but I think it is in the purple family. A purple might bridge the gap between the red and the blue and tie them together somehow.

In some ways, I backed myself into a corner with the red and blue, and created a color combination that does not have an easy resolution.

I find myself doing this quite a bit, because I am experimenting color combinations when I make these prints. I have tried a lot of combinations that are not obvious to me, and aren’t from the usual palette of colors that I would choose. I am trying new things, and sometimes it doesn’t work.

Final Notes

Color can be a tricky thing. Finding the right color to complement and make other colors look good together can be difficult, especially if you use colors that don’t play well together in the first place.

Tomorrow I will have a post with this same sort of look at color choice and resolution, except with examples from the prints that are in progress, but not quite done. I will be share with you what I am planning to do and why, instead of just telling you what I have already done, as I did today.

Also, these prints are currently available for sale to Newsletter Subscribers for my cost for supplies and shipping. They are my nice little bribe to get you to try out my newsletter. This special, “subscriber only” price only lasts until I finish all 101 of these prints, sometime in the next few weeks.

If you would like to see the rest of them and get your chance to purchase them for next-to-nothing prices, sign up for the Newsletter now.

Quick Thanks to Vivaldi
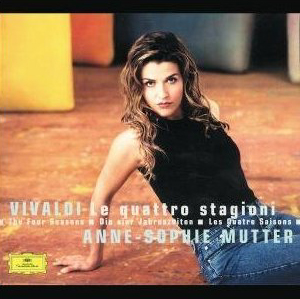
vivaldi4seasons

The Vivaldi clips I used above are from my CD of Vivaldi, “The Four Seasons”, performed by Anne-Sophie Mutter and the Trondheim Soloists. The disc also has “Devil’s Trill” by Tartini on it. It’s a good performance of the pieces, you can Click here to check it out on Amazon.

The disc also features a cover with Anne-Sophie in a strikingly striking pose. If you still need a recording of The Four Seasons for your music collection, this is a good choice.

If you click on the link and buy something, Amazon will give me a small piece of their huge pie (you pay the same price though). This allows me to buy food, make more art, and makes me happier.

As a result, I make more beautiful art, and share it with the world, making it a better place full of more happiness and good will towards men and women.

It’s probably actually your moral and patriotic duty to go buy, buy, buy!

Footnotes

*[note from above]Orange and purple are a split complement of green. The complement of green is red (they are opposite on the color wheel). A split complement is when you take one of the complementary colors, in this case red, and “split” it into two colors on either side of it on the color wheel. In this case, red is “split” into purple and orange, which are an equal distance away from red on either side of the color wheel. Usually, split complements look better when the split is much smaller, meaning that red would be split into a red-purple and a red-orange. The bigger the split, the harder it is to resolve the colors. Now click HERE to go back.
Thinking in layers, Part 2: Order Matters

Friday, December 4th, 2009

Now I’m gonna really mess things up.

Last time I talked about how colors mix together on paper after they are printed, which increases the total number of colors you can get from any number of blocks. By overlapping the areas that blocks print, 2 blocks can print a total of 3 colors, 3 blocks can print 7 colors, and 4 blocks can print 15 colors.

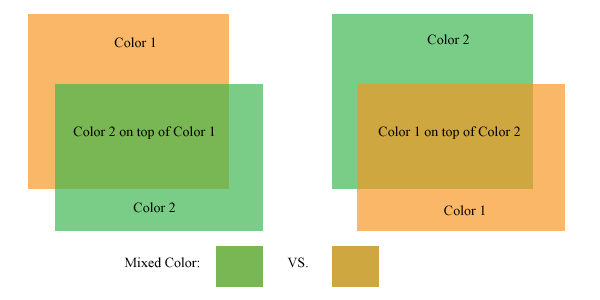
The order that those blocks are printed influences what the mixed color is, as well. If one color is printed on top of another, the color created by the overlap of those two colors isn’t the same if the printing order is reversed.

This quickly ads up to a whole lot of possibilities and choices to make.

Here’s a look at this phenomenon:

Colors mix differently with different printing orders

Colors mix differently with different printing orders

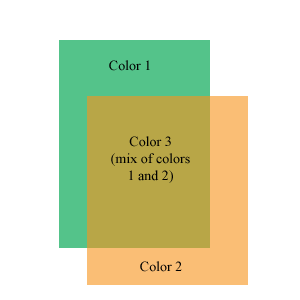
The picture above shows the same two panels of color, but on the left, the green panel is on top of the orange panel. On the right, the orange panel is on top of the green panel. The resulting color created where these two colors overlap is different depending on which color is on top.

In the above example, the mixed color can be a brownish shade of either of the colors. The trick is, it can’t be both. One of the artistic decisions of a printmaker is which order to print the blocks, and which colors will be on the print as a result.

Typically, an artist/printer will print a number of trial prints, trying out different color combinations until settling on a color combination for the final edition. These trials can be as lengthy a part of the printing process as printing the edition, but it is worth it.

The final print often benefits from this type of experimentation. Colors do not always mix the way that we intend them to in our mind, the only way to figure out how two colors will look is to mix them up and put them on paper.

Some considerations:

1. The colors will mix differently based on how transparent the colors are. In the above image, the transparency of each panel of color is set to 67%. This isn’t the exact equivalent of working with inks, but it is close enough to convey the concept. Printing inks are mostly opaque out of the tube or can, transparency is created by adding a transparent medium. I consider this transparent medium the most important can of ink that I have.

A more transparent color has less effect on the colors beneath it

A more transparent color has less effect on the colors beneath it

The more transparent medium I add to the ink, the more transparent it is (duh). The thing to keep in mind is that if a very transparent color is printed over another color, it won’t effect the color underneath much. It will show up a bit on the white of the paper, but the pigment underneath it will overpower the transparent color.

The image at the left is the same two colors as above, but the transparency is increased quite a bit on the green color. This image was created with photoshop, so it does not completely represent how inks behave when printed on paper. If this was printed on paper, the light green color would probably be more visible where printed on the white paper, but hardly perceptible where printed over the orange. If this were printed on paper, the areas where the very transparent green ink overlaps the orange would probably look more like a glossy coating over the orange than anything else.

2. Some colors print more strongly than others. The CMYK process colors (Cyan, Magenta, Yellow, blacK) are usually printed in that order. If a yellow ink is printed underneath a blue or red hued ink, it will not be very visible. The other colors printed over the yellow ink will dominate it and wash it out. Yellow is usually printed on top of the other colors to give it a fighting chance.

Yellow seems to be the weakest link amongst ink colors. Green and Orange can inherit some of this weakness as well, if those colors are created by mixing yellow ink. (Greens and oranges straight from the can or tube can be a bit stronger than home mixed versions)

Ok, enough color science for today. I’ve gotta go to work at DayJob now!

Thinking in Layers

Wednesday, December 2nd, 2009

I’ve been working on a new block for a couple days now, and this one has been a bit of a challenge. I know that this block is going to have a companion block that goes with it, and the two will take advantage of how colors mix when they are printed in layers.

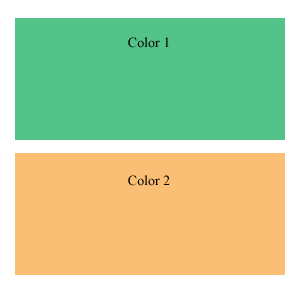
Two separate colors

Two separate colors

One block for every color

Generally, with woodblock printing, for each block, you have one color that is printed. To create a print with three colors, three blocks are needed.

You can see this to the left, in the beautiful image I whipped up to demonstrate this. It would take two woodblocks to print this beautiful work of art.

(Aren’t the colors lovely? Well, at least they demonstrate the point well)

With opaque ink, one-block-one-color is true. Each layer of ink will cover up any other layers of ink under it. With out-of-the-tube ink from your local art store, this is the sort of behavior an artist can expect from their ink.

This is a bit limiting, and luckily for us there is a way to get more from our blocks and from our color by using a little bit of transparency in the ink.

I cheat the system 

My most important ink I have is transparent. It is just ink medium, without any pigment. I add this to my other inks, which are opaque, to add some transparency. The more transparent medium I add, the more transparent the ink becomes.

This creates opportunity, and along with opportunity comes complexity.

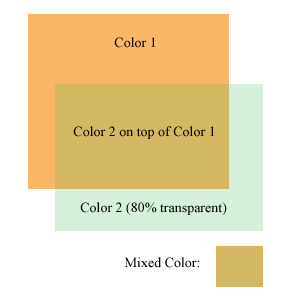
Two colors overlap to create a third color

Two colors overlap to create a third color

Transparency allows the ink to mix on the paper, so that one color will show through another color a bit. They mix to create a third color.

This neat little image on the right I whipped up in Photoshop shows how this works. When two blocks overlap, and transparent ink is used, a third color is created where they overlap. Using this technique, 2 blocks can print 3 colors.

Extending this out to more blocks, 3 blocks can print 7 colors. 4 blocks can print more colors than I care to figure out (11 15, I think, but it is early in the morning).

This hurts my head to think about

My current block is giving me quite a challenge, because I know that it will be printed with another block, and the two will interact to create a third color. When I carve the block, I have to keep in mind that some areas that I carve will be left white on the final print, and some areas will be filled in with the second block. Some areas will be defined by how the two blocks overlap, and I have to leave those areas intact, so that the two colors can print together.

It is interesting to carve a block in this way. Often, I carve blocks with a “black and white” frame of mind. Color will print on the block, except where I carve away.

With this block, I am considering the shapes that this block will print, the shapes the second block will print, the areas where they overlap, and the areas left white by the paper.

I finished carving the first of these two blocks last night (took 3 evenings). I have a busy couple of days coming up, keeping me from my art through the weekend, so I won’t get to the second block till early next week, but look for updates then.

How to Print a Woodblock

Wednesday, October 14th, 2009

Here we go, part 3 of a series explaining what a woodblock print is and how it is made. Part 1 explained what a Woodblock Print is, and Part 2 discussed preparing the block and the ink.

Printing a woodblock consists of rolling ink on the block, and pressing paper against it. There are many more nuances to it though, which I’d like to explain.

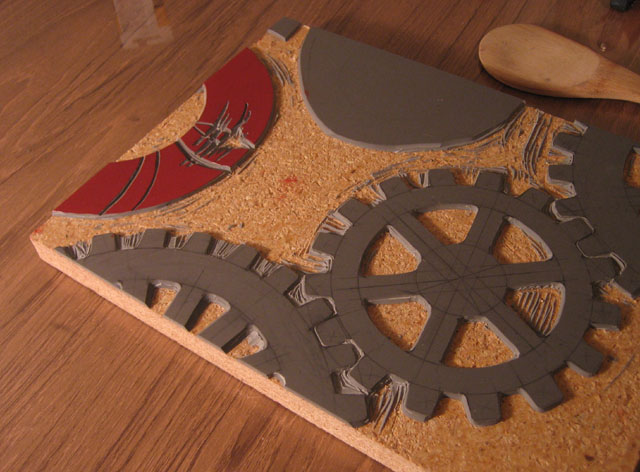
To explain the printing process, I have to take a step back and explain how prints with multiple colors are made. There are a few processes that can be used; the most common is to carve a separate block for each individual color. Each block is printed separately, and the the image is created as the colors are added to the paper.

Here’s an idea of how the different blocks look that go into a multi-colored print:

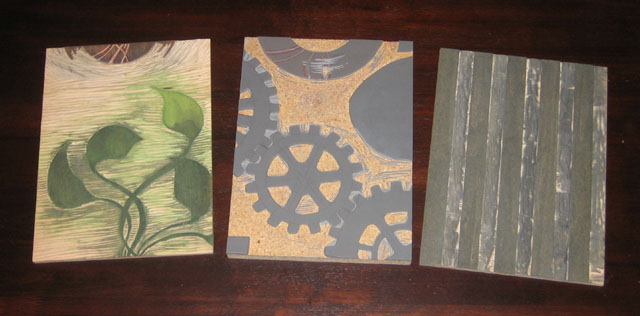
3 blocks used to print 5 different colors

3 blocks used to print 5 different colors

These 3 blocks were used to make the prints that came off the press yesterday. I had to print each block individually with a different color.

A woodblock print made from the 3 blocks shown above

A woodblock print made from the 3 blocks shown above

I did something a little tricky with two of these blocks, I used different portions of the blocks to print different colors. The two leftmost blocks in the image above had a lot of space left on the block after I finished carving the first image, so I used each of the blocks to also print part of the “vase”.

The image to the right is one of the prints made with these blocks. If you look at it closely, you will be able to see which part of which block printed which color.

You will also notice one other aspect to printmaking, which is that everything prints in reverse. When a block is printed against the page, the mirror image of what is on the block ends up on the paper.

Now that I’ve got 3 blocks with a total of 5 colors to be printed, the challenge is to align each of the blocks on the paper. This process of making sure all the blocks line up is called registration. In some way or another, I have to make sure that the blocks all register with one another.

(The question of how the blocks are carved in the first place so that all the images line up is another question for another day)

Before I do that though, I have to ink up the block! The block is inked by simply rolling the roller in the ink, and then rolling it on the block. It takes a few passes of ink on the block to (1) get enough ink on the block to print, and (2) get an even layer of ink on the block so that the color is consistent. Both of these are done by taking time and rolling the ink on the block a number of times.

The ink rolled onto a portion of the block, ready to print

The ink rolled onto a portion of the block, ready to print

I roll the ink on the block, then roll it back in the well of ink that I previously rolled out. I repeat this until their is enough ink and the thickness is consistent.

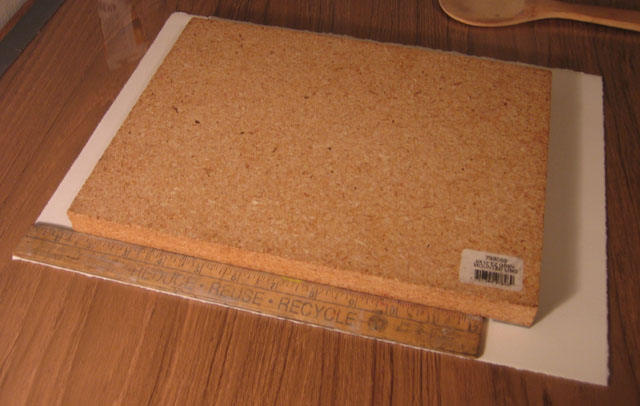
Next, I use my simple registration system – a ruler. The ruler I use is one inch wide, and luckily enough, the margins on these prints is 1 inch as well. I place the ruler along the left side of the paper, and I align the block against the edge of the ruler, with the top of the block 1-1/4 inches below the top edge of the paper.

I use a ruler to align all the blocks in the same place on the paper

I use a ruler to align all the blocks in the same place on the paper

This part of the process is delicate, because if I move the block on the paper, the ink will smear a little bit, and that does not look very nice. I’ve got one chance to lower the block directly onto the paper in the right place with the help of the ruler.

When I get around to printing the next block, I will place the ruler against the edge of the paper again, and line up the next block with the ruler. This way, I make sure that each block gets printed in the same place on each sheet, and all of the colors will line up with each other.

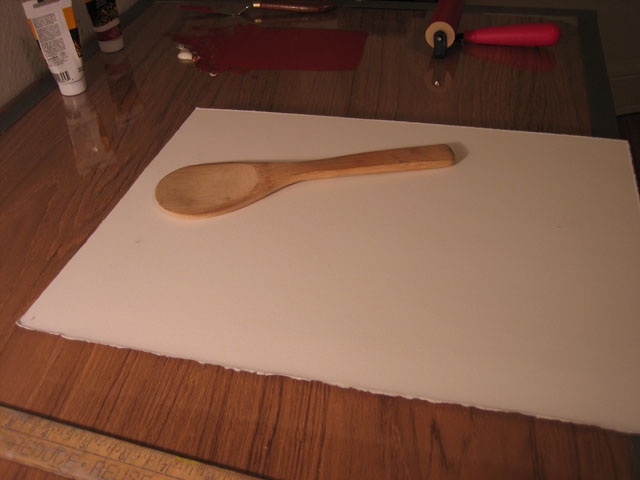
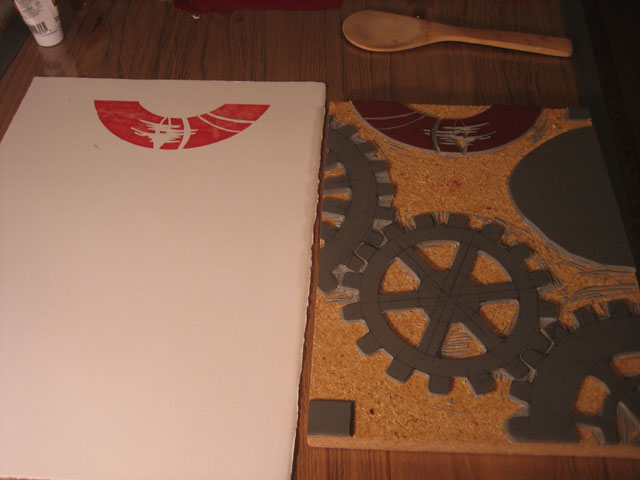
So now the inked block is lying down on the paper. I slide the paper and block off of the table, and flip them over together. I am not so fancy as to have a printing press in my little apartment, so I use a wooden spoon. The spoon in the picture was actually part of a sushi making kit that I got as a gift.

Mmmm. I love the sushi. It’s an incredible food.

The block is flipped over with the paper on top, ready to be pressed with the wooden spoon

The block is flipped over with the paper on top, ready to be pressed with the wooden spoon

This spoon, though it is made for sushi, also seems to be made for woodblock prints. It is very wide, and nearly flat, but with e slight curve to the backside. I rub the backside of the spoon over the back of the paper, pressing it against the block. This takes a few minutes of pressing, because I like to make sure that I get the ink transferred onto the paper well.

When I’m all done, I pull off the paper, and see the ink transferred over. Nice and simple!

The ink is transferred onto the paper, it will take a few more blocks to complete this image

The ink is transferred onto the paper, it will take a few more blocks to complete this image

The real joy of this process is seeing what each block adds to the image. I usually have an idea of how the finished prints will look as I am carving the block, but that vision in my mind can never compare to what I see when I pull the paper off of the block for the first time. Each time a new color is added, I get very excited that first time that I remove the paper from the block and reveal how it looks.