Archive for the ‘Printmaking’ Category

Case Study: Saturation, Value, and Matching Colors

Wednesday, December 30th, 2009

I create a lot of problems for myself that I later have to fix.

A lot of those problems have to do with color.

The 101 Woodblock Series project is largely a design project. I formulated the idea for this project when I was still thinking a lot about design, rather than art. That influence has found its way into this project. Most of the thinking and artistic consideration that goes in to each print has to do with balancing color and shape in a way to make a pleasing image.

Most of the prints have 4 or 5 colors printed on them, which requires mixing a lot of colors, especially considering that each of the 101 prints is different.

The trick is to get all of the colors to work together.

Sometimes, everything works out, and the image just comes together. The colors work together well, and the resulting image is rather… pleasing.

Much more frequently, I create a bit of a “challenge” with the first 2 or 3 blocks, and have to figure out how to fix this “challenge”.

In the challenging prints, the colors don’t quite go together, and the image does not look complete. Often a final color is required to make the disparate colors come together and look good. I think of this as “resolution” of the colors, with “resolution” used in the sense of “resolving” things.

Resolution explained with Music

In Music Theory, Resolution refers to the part of the music that brings everything together, and makes the piece of music feel like it is complete. It is the final note that makes the piece of music complete.

Technically, Resolution is a change within the music from dissonance (sounds that don’t sound good together) to consonance (sounds that do sound good together).

The parallels to printmaking are that I often have to find a color that makes all the previous colors – which don’t quite look good together – fall in to place and look good.

Before going on, I want to show you, with music, what resolution sounds like. I picked part of The Four Seasons, by Vivaldi, to demonstrate Resolution.

This audio file has the very last chord edited out, so that it is unresolved. Take a listen.

Vivaldi Unresolved:


Without the final note in the piece, it feels like everything is left hanging, it is unfinished.

Compare the above to the following audio clip, which is the same music, but with the ending chord left in.

Vivaldi Resolved:


The last chord completes the music, and makes it sound finished. Everything that came before it works together as an overall piece of music, when the last note is added at the end to resolve the music.

Resolution applied to color

I often find myself in situations where I have to pick the right color to visually resolve the colors I previously printed. The colors on the paper up to that point don’t quite work, don’t feel complete. I have to think about what color will tie all the others together, just like the last note in The Four Seasons ties that piece of music together.

I’d like to take you through a brief color imagination experiment:

Imagine something purple. Not bad.

Now add some orange next to it. Not good.

Orange and purple have a natural dissonance them. They don’t look good together. It is difficult to find a 3rd color you can add to these 2 and make the combination look good. It can be done, but it is a challenge (hint: the color that can do this begins with “green” – click to read why*).

Now imagine green and blue together. These colors usually look pretty good together, because they are close in hue. Another color is needed though to make these two colors really pop, other wise they may look fairly drab together. Because they are so similar, the combination of the two can be boring. A small bit of red, or a red-orange color may make those colors really look good together. A neutral color, like brown or gray, can also bring these colors together. Since blue and green naturally work well together, they are easier colors to resolve with a 3rd color.

Examples from Complete Prints

I recently finished a batch of prints, some of them resolved well, some of them did not. In this section I will explain which I think resolved well, which did not, and why.
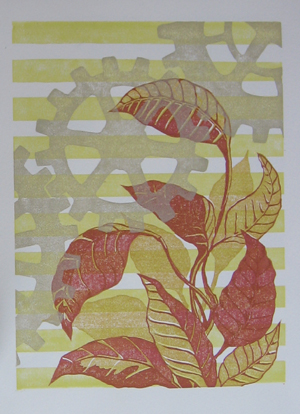

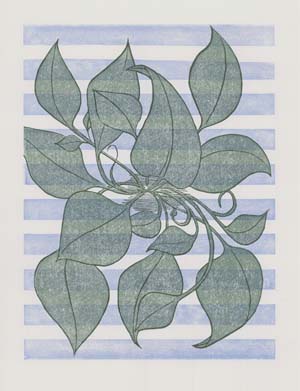
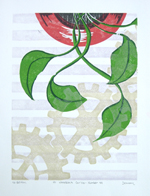
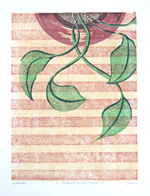
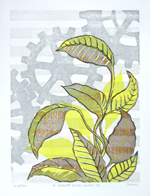
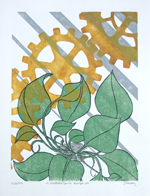
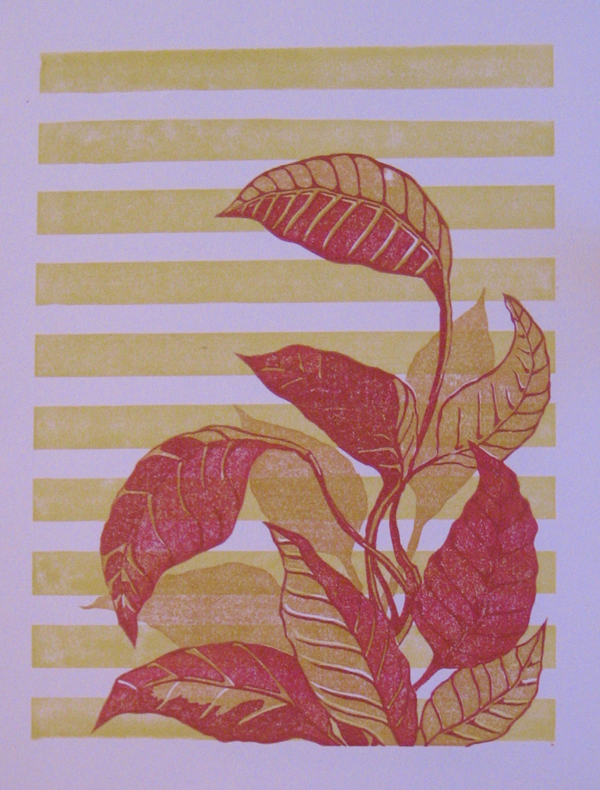
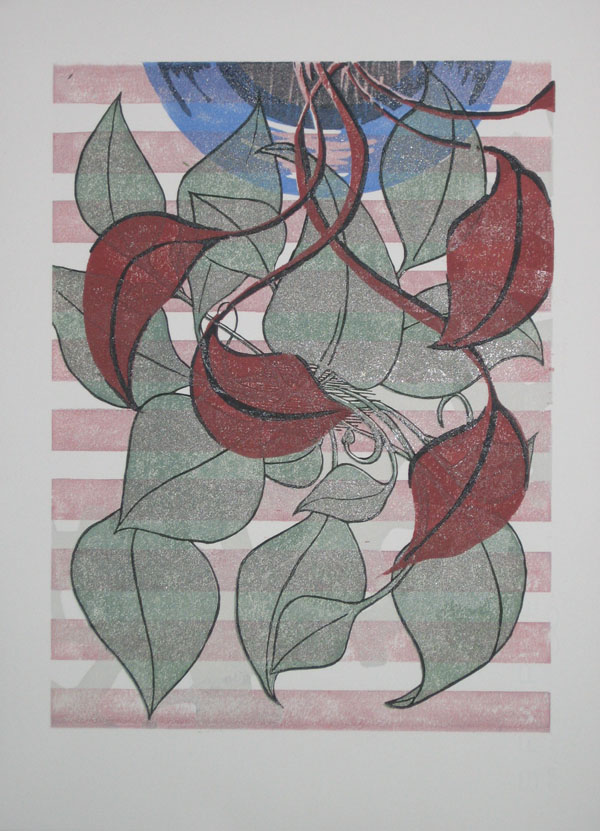
The challenge is to find a color to match the warm oranges and reds

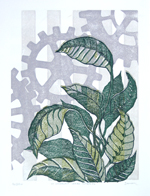
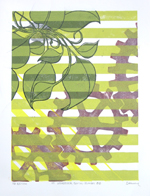
The challenge is to find a color to counter the warm oranges and reds

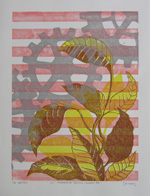
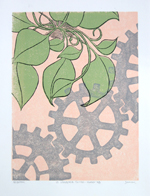
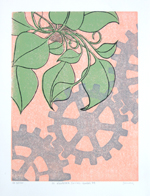
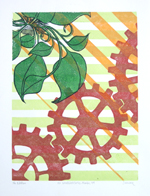
The print on the left surprised me. I started by printing the horizontal stripes, and then the 2 blocks for the leaves. The result was a very vibrant image full of warm colors, yellow, orange, and red. I like the vibrancy of these colors, but I knew that I needed something else to counter the warmth.

Without something to cool down the image a little bit and pull back the warm colors, this image could be too vibrant, to the point that it is difficult to look at. In fact, you can see the print as it looked with just the 3 vibrant warm colors in this post: Weekend Printing Results.

The warm colors in this print are similar in value and hue, and the image gets lost in a sea of orange. This image required a 4th color to resolve the previous 3.

My first thought was to put a cool color, like a blue or a green in there, but after thinking about this, I thought that a cool fourth color would stick out too much, and the image would be a visual game of “one of these things is not like the other”. I took a gamble with the gray color I printed the gears with, and I think it worked out well.

The gray color I printed has a touch of yellow and green to it, and has almost a “cool golden” color to it. The touch of cool that the image needed was added, but with a toned down, grayish hue, so that the value of the cool color did not contrast too much with the overall warmth of the image. The warm vibrancy of this image is something I like about it, and I did not want to counteract that, I just wanted to cool it down a little so that it wasn’t overpoweringly vibrant.
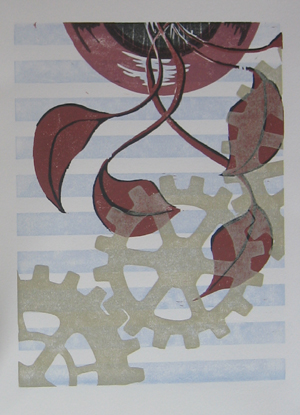
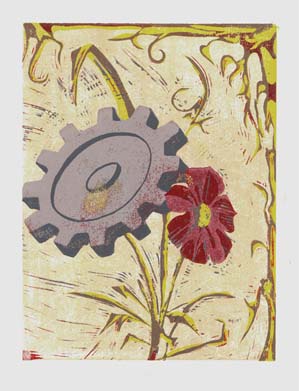
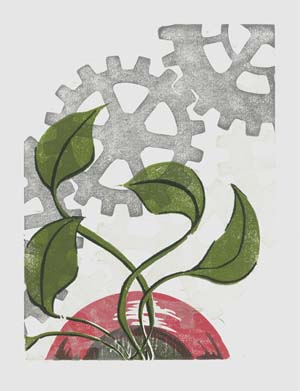
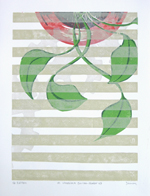
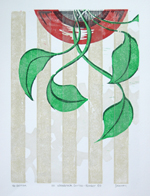
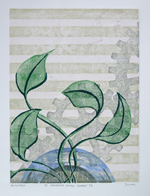
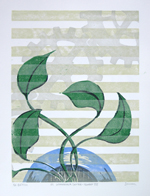
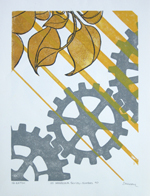
The same color used before did not resolve the colors in this image

The same color used before did not resolve the colors in this image


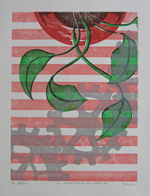
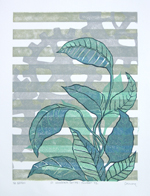
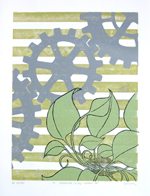
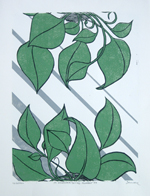
Contrast the use of the “golden gray” color above with the use of the same color in the image at right. In this one, the golden gray color does not resolve the colors in the image, and in fact, makes the dissonance between them worse.

The use of the color for the gears in this image, was, I believe, a mistake.

This image was difficult to finish because I created a visual problem when I printed the first few colors. I like the red in the leaves and the pot, and I like the light, slate blue of the horizontal stripes, but together, they look bad. They have very little in common, and adding the last color of the gears made it worse.

I am still not sure what color would have made this image work, but I think it is in the purple family. A purple might bridge the gap between the red and the blue and tie them together somehow.

In some ways, I backed myself into a corner with the red and blue, and created a color combination that does not have an easy resolution.

I find myself doing this quite a bit, because I am experimenting color combinations when I make these prints. I have tried a lot of combinations that are not obvious to me, and aren’t from the usual palette of colors that I would choose. I am trying new things, and sometimes it doesn’t work.

Final Notes

Color can be a tricky thing. Finding the right color to complement and make other colors look good together can be difficult, especially if you use colors that don’t play well together in the first place.

Tomorrow I will have a post with this same sort of look at color choice and resolution, except with examples from the prints that are in progress, but not quite done. I will be share with you what I am planning to do and why, instead of just telling you what I have already done, as I did today.

Also, these prints are currently available for sale to Newsletter Subscribers for my cost for supplies and shipping. They are my nice little bribe to get you to try out my newsletter. This special, “subscriber only” price only lasts until I finish all 101 of these prints, sometime in the next few weeks.

If you would like to see the rest of them and get your chance to purchase them for next-to-nothing prices, sign up for the Newsletter now.

Quick Thanks to Vivaldi

vivaldi4seasons

The Vivaldi clips I used above are from my CD of Vivaldi, “The Four Seasons”, performed by Anne-Sophie Mutter and the Trondheim Soloists. The disc also has “Devil’s Trill” by Tartini on it. It’s a good performance of the pieces, you can Click here to check it out on Amazon.

The disc also features a cover with Anne-Sophie in a strikingly striking pose. If you still need a recording of The Four Seasons for your music collection, this is a good choice.

If you click on the link and buy something, Amazon will give me a small piece of their huge pie (you pay the same price though). This allows me to buy food, make more art, and makes me happier.

As a result, I make more beautiful art, and share it with the world, making it a better place full of more happiness and good will towards men and women.

It’s probably actually your moral and patriotic duty to go buy, buy, buy!

Footnotes

*[note from above]Orange and purple are a split complement of green. The complement of green is red (they are opposite on the color wheel). A split complement is when you take one of the complementary colors, in this case red, and “split” it into two colors on either side of it on the color wheel. In this case, red is “split” into purple and orange, which are an equal distance away from red on either side of the color wheel. Usually, split complements look better when the split is much smaller, meaning that red would be split into a red-purple and a red-orange. The bigger the split, the harder it is to resolve the colors. Now click HERE to go back.
Printing 2 Recent Blocks

Sunday, December 20th, 2009

Enjoy this video of the trial printing for the two latest blocks in the 101 Woodblock Series. This is my first video, still learning the ropes. The background music is a bit louder than I thought, etc.

Let me know what you think below. Did you learn anything? Enjoy something in particular? Do you have a question about something I didn’t answer?

Weekend Printing Results

Sunday, December 13th, 2009

continuing my current 101 Woodblock Series, I’ve been printing all weekend to get a bunch more started. My current count is 40 prints, completed, 40 in various stage of completion, and 21 more to begin.

I’ve been carving a couple blocks for a while, and recently finished them. Here’s one of the prints of the two blocks:

The most recent blocks printed

The most recent blocks printed

Much more work to do, time to get back to it.

Thinking in layers, Part 2: Order Matters

Friday, December 4th, 2009

Now I’m gonna really mess things up.

Last time I talked about how colors mix together on paper after they are printed, which increases the total number of colors you can get from any number of blocks. By overlapping the areas that blocks print, 2 blocks can print a total of 3 colors, 3 blocks can print 7 colors, and 4 blocks can print 15 colors.

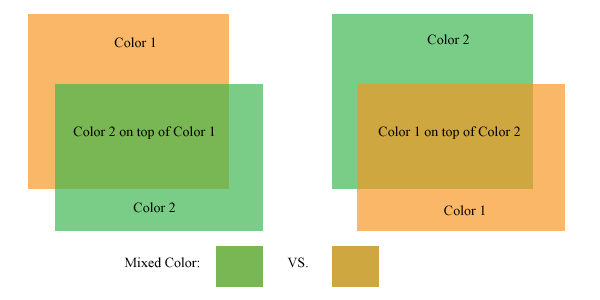
The order that those blocks are printed influences what the mixed color is, as well. If one color is printed on top of another, the color created by the overlap of those two colors isn’t the same if the printing order is reversed.

This quickly ads up to a whole lot of possibilities and choices to make.

Here’s a look at this phenomenon:

Colors mix differently with different printing orders

Colors mix differently with different printing orders

The picture above shows the same two panels of color, but on the left, the green panel is on top of the orange panel. On the right, the orange panel is on top of the green panel. The resulting color created where these two colors overlap is different depending on which color is on top.

In the above example, the mixed color can be a brownish shade of either of the colors. The trick is, it can’t be both. One of the artistic decisions of a printmaker is which order to print the blocks, and which colors will be on the print as a result.

Typically, an artist/printer will print a number of trial prints, trying out different color combinations until settling on a color combination for the final edition. These trials can be as lengthy a part of the printing process as printing the edition, but it is worth it.

The final print often benefits from this type of experimentation. Colors do not always mix the way that we intend them to in our mind, the only way to figure out how two colors will look is to mix them up and put them on paper.

Some considerations:

1. The colors will mix differently based on how transparent the colors are. In the above image, the transparency of each panel of color is set to 67%. This isn’t the exact equivalent of working with inks, but it is close enough to convey the concept. Printing inks are mostly opaque out of the tube or can, transparency is created by adding a transparent medium. I consider this transparent medium the most important can of ink that I have.

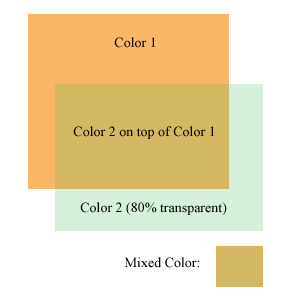
A more transparent color has less effect on the colors beneath it

A more transparent color has less effect on the colors beneath it

The more transparent medium I add to the ink, the more transparent it is (duh). The thing to keep in mind is that if a very transparent color is printed over another color, it won’t effect the color underneath much. It will show up a bit on the white of the paper, but the pigment underneath it will overpower the transparent color.

The image at the left is the same two colors as above, but the transparency is increased quite a bit on the green color. This image was created with photoshop, so it does not completely represent how inks behave when printed on paper. If this was printed on paper, the light green color would probably be more visible where printed on the white paper, but hardly perceptible where printed over the orange. If this were printed on paper, the areas where the very transparent green ink overlaps the orange would probably look more like a glossy coating over the orange than anything else.

2. Some colors print more strongly than others. The CMYK process colors (Cyan, Magenta, Yellow, blacK) are usually printed in that order. If a yellow ink is printed underneath a blue or red hued ink, it will not be very visible. The other colors printed over the yellow ink will dominate it and wash it out. Yellow is usually printed on top of the other colors to give it a fighting chance.

Yellow seems to be the weakest link amongst ink colors. Green and Orange can inherit some of this weakness as well, if those colors are created by mixing yellow ink. (Greens and oranges straight from the can or tube can be a bit stronger than home mixed versions)

Ok, enough color science for today. I’ve gotta go to work at DayJob now!

Thinking in Layers

Wednesday, December 2nd, 2009

I’ve been working on a new block for a couple days now, and this one has been a bit of a challenge. I know that this block is going to have a companion block that goes with it, and the two will take advantage of how colors mix when they are printed in layers.

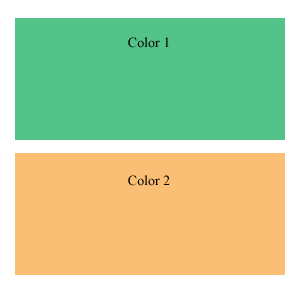
Two separate colors

Two separate colors

One block for every color

Generally, with woodblock printing, for each block, you have one color that is printed. To create a print with three colors, three blocks are needed.

You can see this to the left, in the beautiful image I whipped up to demonstrate this. It would take two woodblocks to print this beautiful work of art.

(Aren’t the colors lovely? Well, at least they demonstrate the point well)

With opaque ink, one-block-one-color is true. Each layer of ink will cover up any other layers of ink under it. With out-of-the-tube ink from your local art store, this is the sort of behavior an artist can expect from their ink.

This is a bit limiting, and luckily for us there is a way to get more from our blocks and from our color by using a little bit of transparency in the ink.

I cheat the system 

My most important ink I have is transparent. It is just ink medium, without any pigment. I add this to my other inks, which are opaque, to add some transparency. The more transparent medium I add, the more transparent the ink becomes.

This creates opportunity, and along with opportunity comes complexity.

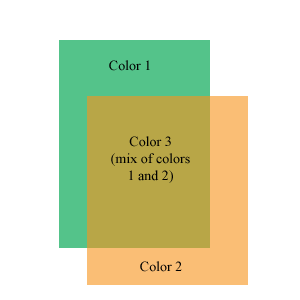
Two colors overlap to create a third color

Two colors overlap to create a third color

Transparency allows the ink to mix on the paper, so that one color will show through another color a bit. They mix to create a third color.

This neat little image on the right I whipped up in Photoshop shows how this works. When two blocks overlap, and transparent ink is used, a third color is created where they overlap. Using this technique, 2 blocks can print 3 colors.

Extending this out to more blocks, 3 blocks can print 7 colors. 4 blocks can print more colors than I care to figure out (11 15, I think, but it is early in the morning).

This hurts my head to think about

My current block is giving me quite a challenge, because I know that it will be printed with another block, and the two will interact to create a third color. When I carve the block, I have to keep in mind that some areas that I carve will be left white on the final print, and some areas will be filled in with the second block. Some areas will be defined by how the two blocks overlap, and I have to leave those areas intact, so that the two colors can print together.
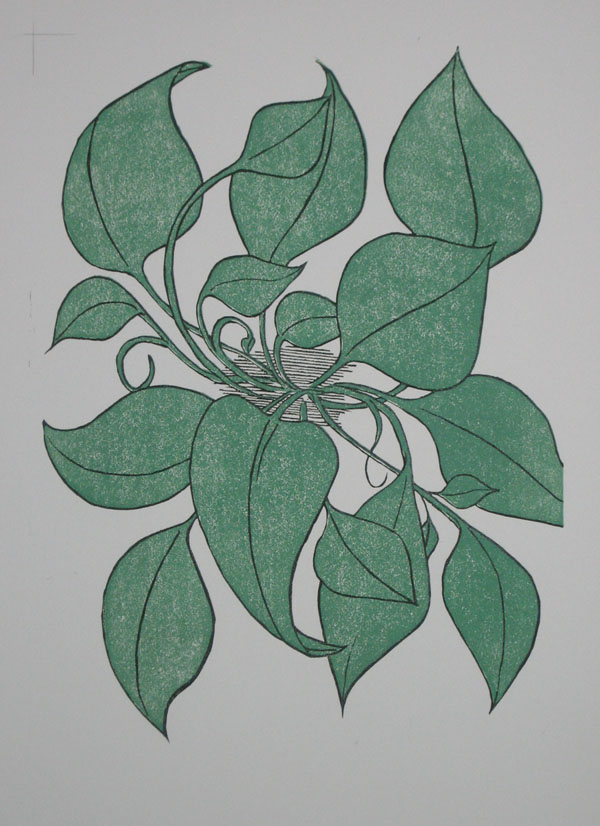
It is interesting to carve a block in this way. Often, I carve blocks with a “black and white” frame of mind. Color will print on the block, except where I carve away.

With this block, I am considering the shapes that this block will print, the shapes the second block will print, the areas where they overlap, and the areas left white by the paper.

I finished carving the first of these two blocks last night (took 3 evenings). I have a busy couple of days coming up, keeping me from my art through the weekend, so I won’t get to the second block till early next week, but look for updates then.

Current Project: The 101 Woodblock Series

Friday, November 13th, 2009

The 101 Woodblock Series was created when acted on the knowledge that the only way that I was going to be satisfied with life is if I actually made art, something that I have known is important to me.

101 Woodblock Series - Number 1

101 Woodblock Series - Number 1

For years, I let things like having a “real” job and working get in the way of creating art. I still have the job to pay the bills, but making art is what actually give me satisfaction.

They always say that you should follow your passions and do what you love to do, but after I finished up college and entered the workforce, that passion got put on the back burner.

It’s been sitting there for years, and I did my best to ignore it for a long, long time, but I finally got to it. I realized that I am not actually going to make anything in this world unless I, well, make something in this world.

I decided that the best way to get to it would be to create One-Hundred and One woodblock prints. Each would be different, and this project would slingshot me back into the habit of making art.

I do this because it feels right to do this.

I have finally felt, in the last few months since starting this project, like I am doing the right thing with my time, and with my life.

So what is the art about?

I like to combine plants and organic growth with graphic design shapes and mechanical stuff, like gears. The 101 Woodblock Series is largely about the designs and images that I can create by combining imagery of plants, flowers, gears, machinery, and abstract, graphic elements.

101 Woodblock Series - Number 3

101 Woodblock Series - Number 3

In some ways, I think that the art is about a combination of peacefulness and diligence, peacefulness from the imagery that comes from nature, and the diligence of mechanical function. In some way, this imagery mirrors the creative process of printmaking, which combines artistic creativity with the craft and skill of the printing process.

What is a Woodblock Print anyway?

These prints are all made by the process called relief printing. Often blocks of wood are used to print from, but blocks of linoleum are also used (especially when your local art store doesn’t stock woodblocks).

The block starts out nice and flat, and certain portions are carved out of the block. When ink is rolled onto the carved block, the roller only touches the portions of the block that were uncarved.
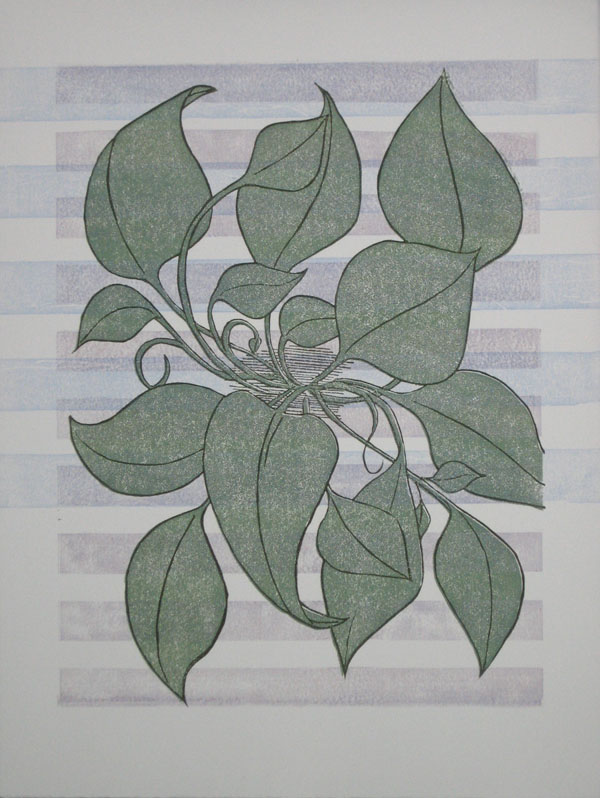
The ink is rolled onto the block, then the block is pressed against paper to transfer the ink. Each color on the final print requires a separate block to print. This can be quite a few blocks per print!

A woodblock print requires both the art of creating an image, balancing the colors and making all of the artistic decisions that an artist might with a painting or a drawing, as well as the craft of printing. The blocks must be aligned, the color mixed correctly, applied to the block smoothly, and transferred to the paper evenly.

101 Woodblock Series - Number 15

101 Woodblock Series - Number 15

Art Up For Grabs

The prints in this series are currently available to Insider Newsletter subscribers only. Insiders get the opportunity to purchase one of these prints for my costs to make and ship them. I’m only charging enough to cover my costs for the paper, ink, and blocks that are going in to making these prints, and for the cost to ship it to you.

This offer is only going to last until the series is done, and then the price for all of the prints in this series will increase. If you want to get a piece of hand-printed original art for about the cost of a sandwich and a soda (at least in Downtown San Francisco), click here and sign up for the Insider Newsletter.

UPDATE, 7 Feb 2010: This project is done. The low price is going to remain until mid to late February, then the price increases.

UPDATE, 22 Feb 2010: The promo time period is over, and these go to full price.

The Details

Each print is:

  • Hand inked and printed on Rives BFK paper
  • Completely unique. No two are exactly alike.
  • paper size: approximately 11″x15″
  • image size: 9″x12″
  • Shipped in a large flat envelope between rigid cardboard

For more information about this series and how to add one of the series to your collection, sign up for the Insider Newsletter.

UPDATE, 18 Jul 2020: These aren’t really for sale anymore.

What the 101 Woodblock Series Means

Wednesday, November 11th, 2009

Hey –

I recorded this audio presentation for you to check out. I want to let you know what this 101 Woodblock Series is all about, and what it means to me.

I don’t want a shroud of mystery around my art, I want you to know what the deal is.

You can play the audio in this little doohickey below, it is only about 8 or 9 minutes long. I was drinking coffee while I recorded this, so feel free to pour yourself a cup of coffee while listening.

[EDIT: This audio is no longer available]

As I mentioned in the audio, CLICK HERE to see the online gallery[LINK REMOVED] of 101 Woodblock Series prints.

A print is not necessarily a Print

Wednesday, November 11th, 2009

The word “print” can mean a couple different things. It is frustrating to me when I tell people that I make prints and they misunderstand, and I think it has led to a fair bit of confusion for the average art connoisseur.

A “print” can be:

  • A hand created and printed piece of artwork, created either as a monotype, relief print, intaglio, or lithograph
  • A high quality reproduction of a work of art using photographic and mechanical means. These are also sometimes called “lithograph”
  • A poster

I’m going to go a little in depth into each one and explain the difference.

Handprinted Art Prints

These types of prints are drawn on the printing element by hand, inked by hand, and hand printed or run through a manual printing press. The main methods used to print these types of prints are monotype, relief (ie. woodblock), Intaglio (or etching), and lithography. Silkscreen can be included in this list, though silkscreen seems to be more widely used for craft rather than art.

Each print made by these methods is an original work of art. In fact, there is no “original” to speak of, because no image is being reproduced. The image is being produced for the first time with the printing elements (the plates, block, stones, etc), it is just being produced a number of times.

When people refer to Fine Art Printmaking, it is this type of printmaking that they refer to. Since these prints are original art, these types of prints maintain and increase in value over time. These are the type of prints that investors and collectors purchase.

This type of Printmade Fine Art is the type of prints that I make and sell here on BDD.

High Quality Reproductions

These type of prints are often referred to as a “limited edition Lithograph” or a Giclée print. These are high quality reproductions of an original work of art. The original art is created, and then photographic and mechanical methods are used to reproduce it.

These prints will often be signed and numbered, and issued as a limited set, so these can be easily confused with Printmade Art prints. This gets more confusing because these are often referred to as “lithographs”. The tricky thing about this language is that pretty much everything is a lithograph. Newspapers and magazines are lithographs, they are just produced by industrial lithography, rather than hand-printed lithography.

These types of lithographs are not hand printed in the fine art sense, though there may be an operator working the printing press.

Sometimes these will be called Giclée prints. Giclée is essentially a really fancy ink jet printer. (And I mean really fancy. I’ve seen Giclée printer produce prints, and they look mighty nice.

Though these types of prints are often limited editions, they do not hold and increase their value as well as original printmade art. They may maintain some value, and increase in value, depending on the artist and the work, but they won’t be an investment like a hand printed art print.

Posters

We all know about these kind of prints. These are the type that we hung in our college dorm room, to show off our appreciation for Van Gogh or Monet. These are the type of print that you will get at Museum gift shops or stores that sell art prints.

These prints are a great way to be able to look at your favorite work of art. Certainly, I know that I won’t ever own a Manet or Renoir painting, so this type of poster would be the appropriate way to have this art in my apartment.

These types of prints are not signed and numbered. They are mass produced, and are a consumable good. They are pretty, but they are not original art.

101 Woodblock Series Partial Gallery

Tuesday, November 10th, 2009

Each print is printed on approximately 11″x15″ paper. The image size is 9″x12″.

101 Woodblock Series - Number 18

101 Woodblock Series - Number 18

101 Woodblock Series - Number 44

101 Woodblock Series - Number 44

101 Woodblock Series - Number 47

101 Woodblock Series - Number 47

101 Woodblock Series - Number 49

101 Woodblock Series - Number 49

101 Woodblock Series - Number 50

101 Woodblock Series - Number 50

101 Woodblock Series - Number 52

101 Woodblock Series - Number 52

101 Woodblock Series - Number 53

101 Woodblock Series - Number 53

101 Woodblock Series - Number 55

101 Woodblock Series - Number 55

101 Woodblock Series - Number 56

101 Woodblock Series - Number 56

101 Woodblock Series - Number 58

101 Woodblock Series - Number 58

101 Woodblock Series - Number 65

101 Woodblock Series - Number 65

101 Woodblock Series - Number 66

101 Woodblock Series - Number 66

101 Woodblock Series - Number 68

101 Woodblock Series - Number 68

101 Woodblock Series - Number 72

101 Woodblock Series - Number 72

101 Woodblock Series - Number 78

101 Woodblock Series - Number 78

101 Woodblock Series - Number 79

101 Woodblock Series - Number 79

101 Woodblock Series - Number 80

101 Woodblock Series - Number 80

101 Woodblock Series - Number 84

101 Woodblock Series - Number 84

101 Woodblock Series - Number 88

101 Woodblock Series - Number 88

101 Woodblock Series - Number 90

101 Woodblock Series - Number 90

101 Woodblock Series - Number 94

101 Woodblock Series - Number 94

101 Woodblock Series - Number 97

101 Woodblock Series - Number 97

101 Woodblock Series - Number 99

101 Woodblock Series - Number 99

101 Woodblock Series - Number 100

101 Woodblock Series - Number 100

The continuing saga of Block 5

Monday, November 9th, 2009

I’ve noticed something about a lot of my blog posts. At the end of the posts, I say I am gonna continue in the next posts and write about the next part of the subject. Then I never really write that next post. I’m kinda flaky like that.

But not today!

It’s a beautiful Monday morning, I’ve got some delicious white plums cut up, trucks are falling off the bay bridge, and my cup of coffee is almost done brewing. Time to continue the saga of Block 5, the coolest linoleum block ever to be made!

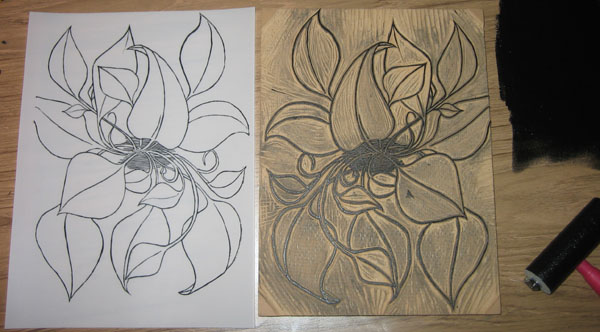
So I finished up the start of the story of Block 5 with the block completely carved. As I was carving the block, I realized that I would like another block to print to add some color to this block. This requires transferring the image from Block 5, the line art, to another block.

To do this, I printed block 5 on a sheet of mylar, as shown below:

The block is printed on mylar to transfer the image

The block is printed on mylar to transfer the image

Mylar is a thin, but rigid plastic material. The ink prints onto the mylar well, because it has a little roughness to the surface, but it does not soak in to the mylar, like ink does on paper. This is perfect for transferring images from one block to another, because the ink does not dry, and stays right on the surface.

I take the sheet of mylar, and press it against the surface of block 6 to transfer the image.

Using the mylar, the image is transfered to a fresh block, Block 6

Using the mylar, the image is transfered to a fresh block, Block 6

Since prints print backwards, I have to go through these two steps to get the image on tho the final block correctly. When I first printed block 5, it came out backwards on the mylar. When I press the mylar on block 6, it transfers the image backwards again. Double backwards, is, of course, forwards.

Printmaking Aside: This is pretty much what biog, industrial lithograph machines do, the kind that print magazines, newspapers, etc. The panel that is printed is on one roller, than there is another roller that the image gets printed on. This second roller then prints that ink on to the paper. By transferring the image twice, rather than once, the image comes out the way it looks on the block.

Back to block 6, now I have lines to use as a guide, and I carve up the block to print a flat color behind the line art. Here is block 6 after it has been carved and the ink cleaned up:

Block 6 is carved and ready to print

Block 6 is carved and ready to print

So now I’ve got these two blocks. What to do with them. What to do…

Here’s how Block 5 and Block 6 look printed together:

Block 5 and 6 printed (click for larger)

Block 5 and 6 printed (click for larger)

In the top left corner you will notice some pencil marks. I drew these on the block when I was printing the first block on the paper so that I would know where to line up the second block. It is a pretty crude system, but it worked fairly well. I only lost one print over the weekend to poor print alignment.

Now the fun begins. I combine this block with some of my other blocks to make some woodblock prints. Here’s a few of the completed prints I finished this weekend that involve Block 5 and Block 6:

Block 5 and 6 were used as background for a previous block in this print (click for larger)

Block 5 and 6 were used as background for a previous block in this print (click for larger)

I like how the blue horizontal bands extend beyond the image area (click for larger)

I like how the blue horizontal bands extend beyond the image area (click for larger)

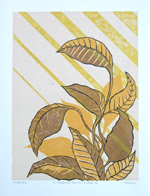
Since it is autumn (supposedly), here's something in brown (click for larger)

Since it is autumn (supposedly), here's something in brown (click for larger)

If you want on the inside list for the release of these prints, sign up for the Bad Deacon Design newsletter by clicking here.