Here we go, part 3 of a series explaining what a woodblock print is and how it is made. Part 1 explained what a Woodblock Print is, and Part 2 discussed preparing the block and the ink.
Printing a woodblock consists of rolling ink on the block, and pressing paper against it. There are many more nuances to it though, which I’d like to explain.
To explain the printing process, I have to take a step back and explain how prints with multiple colors are made. There are a few processes that can be used; the most common is to carve a separate block for each individual color. Each block is printed separately, and the the image is created as the colors are added to the paper.
Here’s an idea of how the different blocks look that go into a multi-colored print:
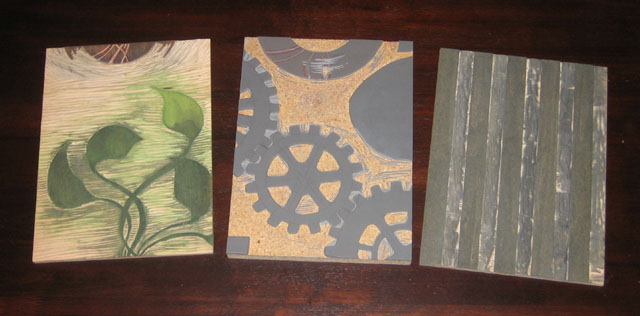
3 blocks used to print 5 different colors
These 3 blocks were used to make the prints that came off the press yesterday. I had to print each block individually with a different color.
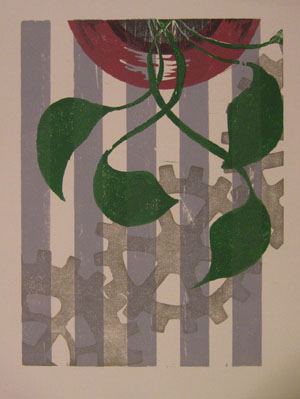
A woodblock print made from the 3 blocks shown above
I did something a little tricky with two of these blocks, I used different portions of the blocks to print different colors. The two leftmost blocks in the image above had a lot of space left on the block after I finished carving the first image, so I used each of the blocks to also print part of the “vase”.
The image to the right is one of the prints made with these blocks. If you look at it closely, you will be able to see which part of which block printed which color.
You will also notice one other aspect to printmaking, which is that everything prints in reverse. When a block is printed against the page, the mirror image of what is on the block ends up on the paper.
Now that I’ve got 3 blocks with a total of 5 colors to be printed, the challenge is to align each of the blocks on the paper. This process of making sure all the blocks line up is called registration. In some way or another, I have to make sure that the blocks all register with one another.
(The question of how the blocks are carved in the first place so that all the images line up is another question for another day)
Before I do that though, I have to ink up the block! The block is inked by simply rolling the roller in the ink, and then rolling it on the block. It takes a few passes of ink on the block to (1) get enough ink on the block to print, and (2) get an even layer of ink on the block so that the color is consistent. Both of these are done by taking time and rolling the ink on the block a number of times.
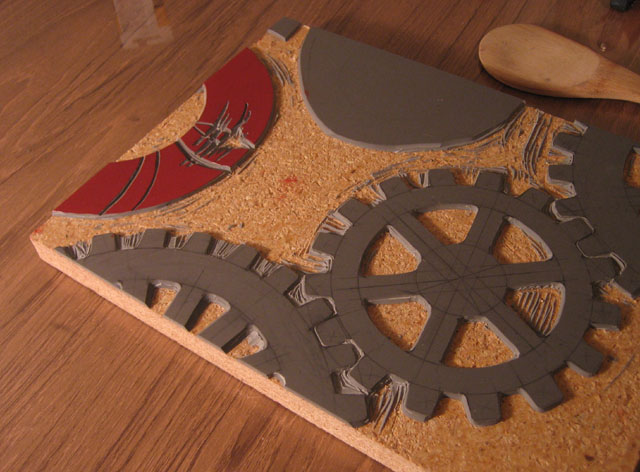
The ink rolled onto a portion of the block, ready to print
I roll the ink on the block, then roll it back in the well of ink that I previously rolled out. I repeat this until their is enough ink and the thickness is consistent.
Next, I use my simple registration system – a ruler. The ruler I use is one inch wide, and luckily enough, the margins on these prints is 1 inch as well. I place the ruler along the left side of the paper, and I align the block against the edge of the ruler, with the top of the block 1-1/4 inches below the top edge of the paper.
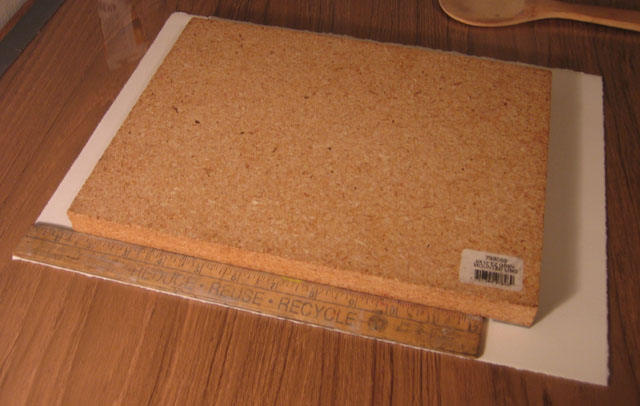
I use a ruler to align all the blocks in the same place on the paper
This part of the process is delicate, because if I move the block on the paper, the ink will smear a little bit, and that does not look very nice. I’ve got one chance to lower the block directly onto the paper in the right place with the help of the ruler.
When I get around to printing the next block, I will place the ruler against the edge of the paper again, and line up the next block with the ruler. This way, I make sure that each block gets printed in the same place on each sheet, and all of the colors will line up with each other.
So now the inked block is lying down on the paper. I slide the paper and block off of the table, and flip them over together. I am not so fancy as to have a printing press in my little apartment, so I use a wooden spoon. The spoon in the picture was actually part of a sushi making kit that I got as a gift.
Mmmm. I love the sushi. It’s an incredible food.
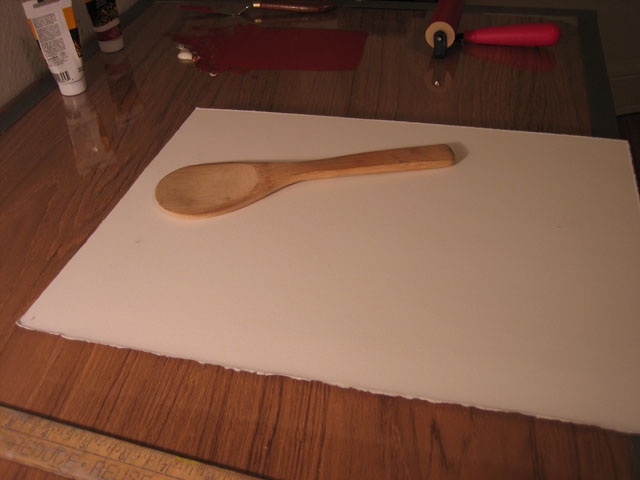
The block is flipped over with the paper on top, ready to be pressed with the wooden spoon
This spoon, though it is made for sushi, also seems to be made for woodblock prints. It is very wide, and nearly flat, but with e slight curve to the backside. I rub the backside of the spoon over the back of the paper, pressing it against the block. This takes a few minutes of pressing, because I like to make sure that I get the ink transferred onto the paper well.
When I’m all done, I pull off the paper, and see the ink transferred over. Nice and simple!
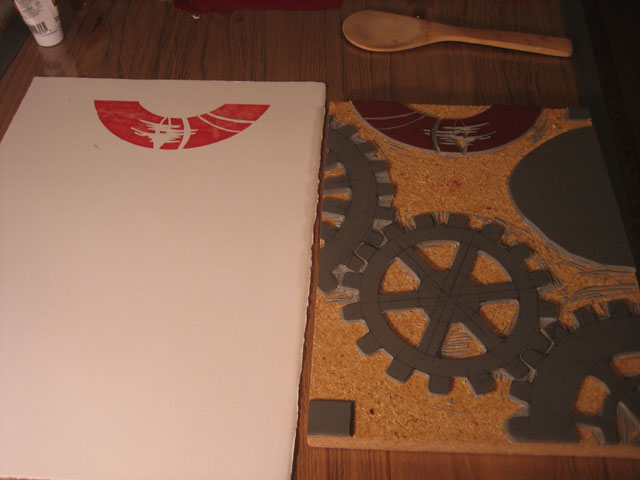
The ink is transferred onto the paper, it will take a few more blocks to complete this image
The real joy of this process is seeing what each block adds to the image. I usually have an idea of how the finished prints will look as I am carving the block, but that vision in my mind can never compare to what I see when I pull the paper off of the block for the first time. Each time a new color is added, I get very excited that first time that I remove the paper from the block and reveal how it looks.
Tags: 101, Art, Color, Ink, Printmaking, Registration, Woodblock Print
I’m thinking you need some C clamps on that ruler.
.-= Dave Doolin´s last blog post ..WordPress Gotcha! Don’t “Please Try Again” when “Save Draft” fails =-.