I’m one of those people that has a lot of stuff. My apartment always seems to be cluttered, I think that entropy is a little stronger than usual in my life.
Last night I reached a tilting point. I have been working late hours and not sleeping quite enough, and one of the results is that I have ignored a lot of the nuts and bolts of life. I spent last night tightening the nuts and picking up the bolts, taking care of laundry, dishes, and most of all de-cluttering my desk.
This morning I woke up to a clean desk with my computers, drawing supplies, carving tools, and the most basic of office tools. The simplicity and cleanliness breathed new life into my morning work.
A nice clean work space makes everything nicer.
New (No) Work
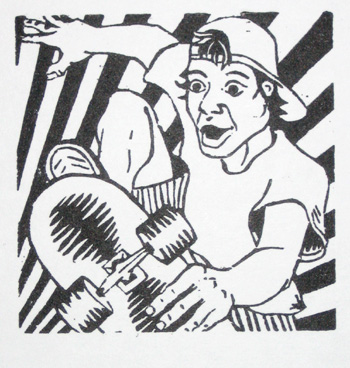
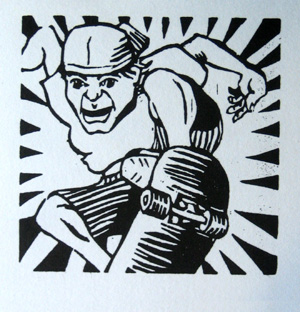
My emphasis on cleanliness kept me away from this series of skater prints I have been working on. I have one in progress though, so I thought I would show you how I make these things.
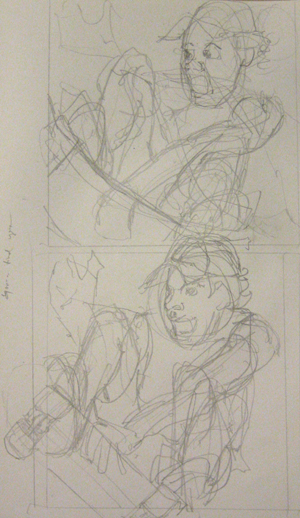
I start out with a few quick sketches, like you see on the right. These are little more than scribbles, to get the basic gist of the shapes, movement, and energy I am trying to get.
I think about the overall movement in the sketch first of all, then later I fill it in with the structural details of the body. It is very easy to draw figures that look stiff and sorta awkward, it takes a bit more work to make the figures look like they are moving. I don’t always completely succeed, but that is where my mind is.
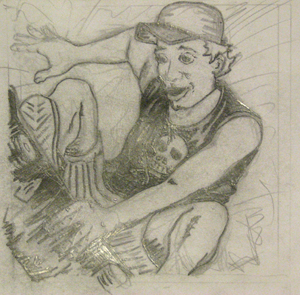
Once I’m done with the quick sketches, I do a more fleshed out sketch, where I really work out how I want the print to look. Check it out on the left
I build up these sketches with darker and darker pencil lines. I start with a very hard pencil, usually a 4H, sometimes a 6H.
Quick note about pencils: Pencils are designated by how hard or soft the graphite is. Harder graphite makes a finer, lighter line, softer graphite makes a darker, “smooshier” line. The range is from 9H (the hardest), to 9B (the softest). HB is right in the middle, #2 pencils are typically HB.
Altogether, the scale is: 9B, 8B, …, 2B, B, F, HB, B, 2B, …, 8B, 9B.
So back to the sketch, I use a 4H to sketch the basic shapes. After I have gotten this fairly well determined, I use a 2H to continue to flesh out the drawing. I use the 2H until the drawing starts to take shape.
last I switch to a soft pencil, a 6B, to really nail the linework. These woodblock prints will be printed in black and white, with no grayscale. The soft pencil puts a very dark line on the paper, and it duplicates the effect that a carved block will have fairly well.
The other advantage of using a soft pencil is that they do not hold a sharp point for longer than a few lines. It is difficult to get a very fine line with the woodblocks that I am using, so using the softer pencil gives me a better idea of what I will realistically be able to carve.
Put it on Wood
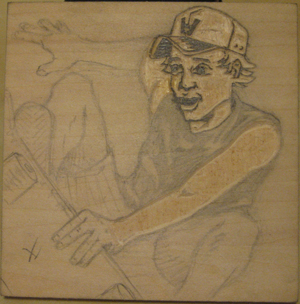
Third skater block, carving in progress
When I’m happy with the sketch, I draw the image again in pencil on the block. I usually again start with the 4H, but have to be careful, because the pencil will scratch the block surface if I press too hard. I follow the same pattern as with the paper sketch, I switch to a 2H, then eventually a 6B. When the 6B drawing is done, I start carving.
As I carve, I continually remark the block with my 6B pencil, because the graphite smears away as I work. I also tip the pencil on the side, and rub it over the carved areas, to get an idea of how the block will look when I roll it with ink.
The carving takes a while, especially delicate areas like the hands and face. The block you see on the right is my progress after about 2 hours of carving.
The head and the left arm are carved, but that is it. This block probably has another 2 or 3 hours of carving to do.
And of course, what was I listening to when I worked on this?
- Crucifix – Dehumanization
- Operation Ivy – Energy
- Final Conflict – Ashes to Ashes
- Bad Religion – ’80 – ‘85
It’s just punk rock.
