Did you make a potato print back in elementary school? You cut the potato in half so there is a flat edge, then carve some sort of shape in to it, a heart or a star, then you dipped it in poster paints, and pressed it against paper. You essentially made a stamp out of a potato.
A woodblock print is no different. It is printed from a flat piece of wood that has portions carved away, so that the ink doesn’t print there.
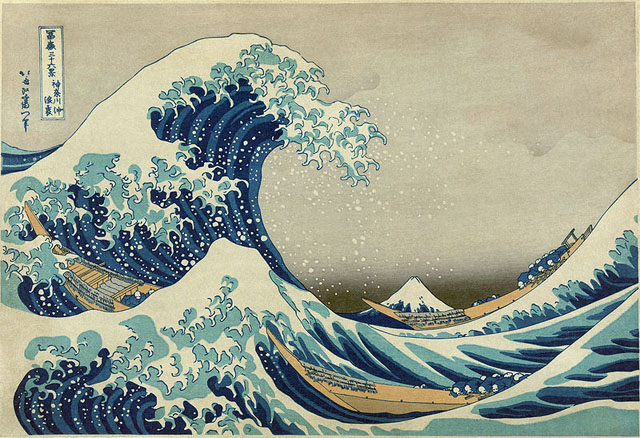
Woodblock prints are not very common in Art History, but the most famous woodblock prints were made in Japan. You probably recognize the image below, it is a woodblock print by the artist Hokusai from 19th century Japan. This print is titles The Great Wave off Kanagawa (Kanagawa Oki Nami Ura is the Japanese title). This print was the first in a series called 36 Views of Mount Fuji. You can see Mount Fuji in the background of the image, in the dip between the waves. Hokusai’s prints are an inspiration for and influence on my own woodblock prints.

The Great Wave Off Kanagawa by Hokusai
The Wood Makes the Print

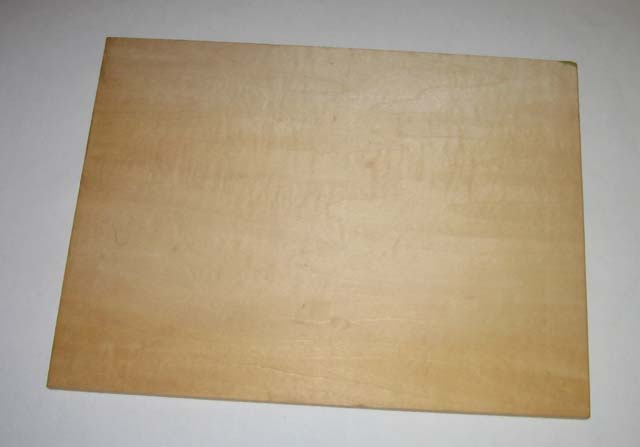
Woodblock for a woodblock print
To make a woodblock print, I start out with a smooth, flat piece of wood (or sometimes linoleum as a substitute). I have to have some sort of image in mind when I start. I determined that the imagery for the 101 Woodblock Series is going to be gears, flowers, and plants, so I know what I am trying to accomplish image wise.

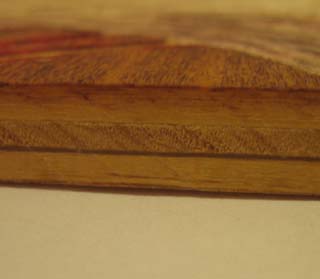
Section of Wood
The wood is special made for prints. I have actually had the block you see above for a very long time. I got this block about 10 years ago, but only recently put it to use. I believe that this block was made in Japan. The block itself is made of 5 plys (layers). The middle 3 plys are about 1/8-inch thick. The ply on the top and bottom are extremely fine. They are about 1/100-inch thick! I used my scale to measure the thickness, and it was too small to measure, even with my scale that measures in 1/60-inch increments! The direction of the grain alternates on each layer, creating a very sturdy block.
The next step is to carve the block. A woodblock is printed by rolling ink on a roller on to the woodblock. Every part of the wood that I do not carve away gets ink rolled on to it. The portions of the block that are carved away do not get ink, because the roller rolls on the flat, untouched portion of the block, missing the “valleys” that I have carved in.
Tools of the trade

Woodblock Print Tools
Here’s a list of the tools I use and why and how I use them. From right to left in the picture above:
- Compass: A lot of the imagery I like involves circles. I have a number of compasses that range in size to help me carve perfect circles. The compass shown is one of the larger compasses I use.
- X-Acto Knife: I have a nice set of X-Acto knifes with a wide selection of blades. This set was a gift many years ago (thank you Uncle David and Aunt Kathy!), and is extremely useful. The knife shown is what I most often use for woodblocks. It is the largest of the set, and I can get the most leverage out of it. Unfortunately, this also means that it cuts me the deepest when I slip. If you don’t bleed a little for your art though…
- Gouges: I have a set of cheap gouges that I use to remove large portions of the block. The X-Acto knife does the fine work, but these gouges do rough work. These can remove a lot of material from the woodblock quickly. The gouges I have are pretty low quality, I will have to upgrade soon.
- Pens and Pencils: I use these to draw the image on the block before I start carving. The nice thing about a block is that unlike paper, I can draw without worrying about mistakes. In the end, the block will be carved and ink will be rolled on it, so any pencil and pen marks will not show up.
Coming Attractions
I’m out of time in my morning writing hour, so check back tomorrow for a follow up. I’ll be covering carving the block and rolling out ink. I’ll finish up with a post about printing the block and registering multiple blocks (what does that even mean?), and all the other stuff that goes in to making a woodblock print.