You have a lot of options when it comes time to frame your woodblock print.
The traditional thing to do is to frame and mat the print, which is what I will explain below. This isn’t the only option, however, and you might be able to find another type of frame that will work just fine.
The most important thing to consider when you frame your art is what will make you happy. Don’t be swayed by how you think a piece of art should be framed, if you like how something looks, go with it. Ultimately, frame the piece how you think looks best..
Non-Traditional (and Easy) Framing Options
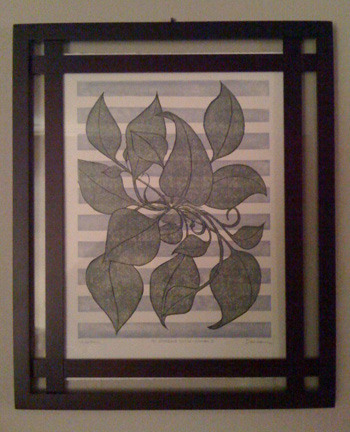
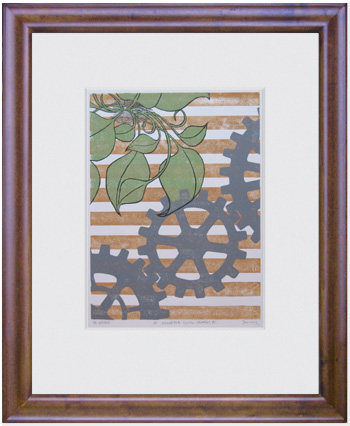
This frame is not a traditional style of frame, and it looks great!
Longtime friend and collector Dave D. found the frame you see at left at Bed Bath & Beyond, or Pier 1 Imports, or one of those types of stores. It isn’t quite a normal rectangular frame. I took this picture when I was over at Dave’s house for a visit. It is hanging on his wall, and it looks great!
Most of the prints sold on this site are on 11″x15″ paper, and the image size is 9″x12″. Any unconventional frame with an opening about that size will work. There are plenty of options if you want an unconventional frames, meaning something other than the usual regular rectangle.
This particular frame looks like it was made for this print. If you go out shopping for frames, it may help to bring the print with you. If you find something that you think might look great with the print, but you aren’t quite sure, you will be able to easily check.
I have just one favor to ask. As you walk through the store with your print, holding it up to frames to see what will look best, when people ask you where you got that beautiful woodblock print you have with you in the store, please direct them to this website…
I don’t have a particular resource to point you to for these types of non-standard frames, but check a local store or two, you might find the perfect frame (mini-serendipity!)
Clip Frames
I think the frames that “float” the print between two sheets of glass, or squeeze the print between a sheet of glass and a mat – without an actual frame around the perimeter — look nice. These types of frames have a minimal, modern look, and are easy to find.
These types of “frameless” frames are called “Clip Frames” (for the clips that hold the glass against the print). A 12″x16″ Clip Frame is suitable for most of the prints sold on this site. A quick Google search should point you to locations where you can order frames like this for under $10, or you can probably find one at a local store.
If you go with this option, you may need a sheet of paper or mat board to go behind the print. A lot of these types of clip frames use Masonite on the backside, which is a brown color. Since the print is on 11″x15″ paper, this brown will show all around, unless you cover it up. A white 12″x16″ sheet of mat board behind the print will make the the print look great in a clip frame.
A bonus of clip frames is you get to see the entire sheet of paper. The paper around the image is as much a part of the art as the image itself. I consider how much paper margin to leave around the print, and that margin is part of the art.
The other way to display the entire print in a conventional frame is to float the print, which I guess could be considered an “advanced framing technique”. Advanced or not, it certainly is more work.
Framed and Matted Prints
The traditional way to frame a woodblock print, and for good reason. A framed print surrounded by a well-cut mat looks fantastic. There are two things to consider when framing in this way, the frame and the mat. I’ll explain the considerations required for both.
The Frame
A framing shop will be more than happy to put together a custom frame for you (and charge you for it), but you can buy a standard frame just as easily. Already made frames are available in standard sizes, the standard sizes that will work with these prints are 12″x16″, 14″x18″, and 16″x20″.
How do you pick which size? That is up to you. Below are the three sizes of frames shown with a print. Note, these are mock ups, not photos of framed prints, but the mock ups are to scale. This is an accurate look at how 9″x12″ prints look in different size frames.
First up is the smallest, 12″x16″. This is pretty small, and only leaves room for about an inch of mat around the print. Not a whole lot.
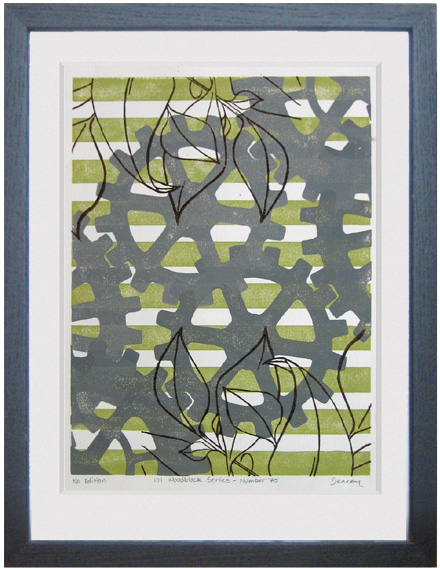
101 Woodblock Series - Number 70 in a 12x16 frame
Next, the same print in a 14″x18″ frame. This size frame allows for a larger mat border, a good 2″ or so on either side.
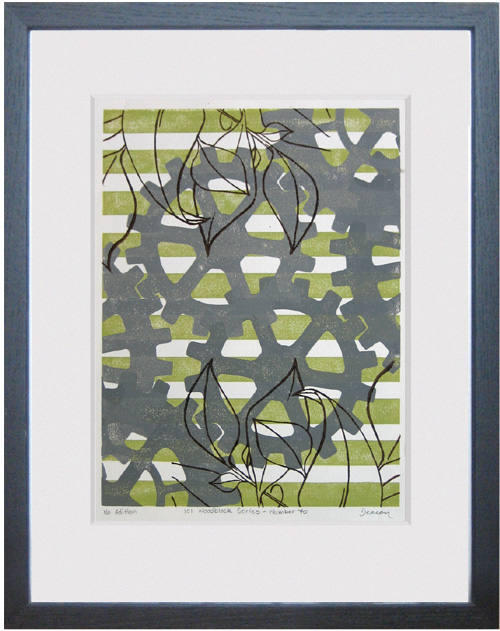
101 Woodblock Series - Number 70 in 14x18 frame
Finally, a different print in a 16″x20″ frame. This size really allows for a nice hefty mat border. These extra 2″ will make this print very prominent on your wall.
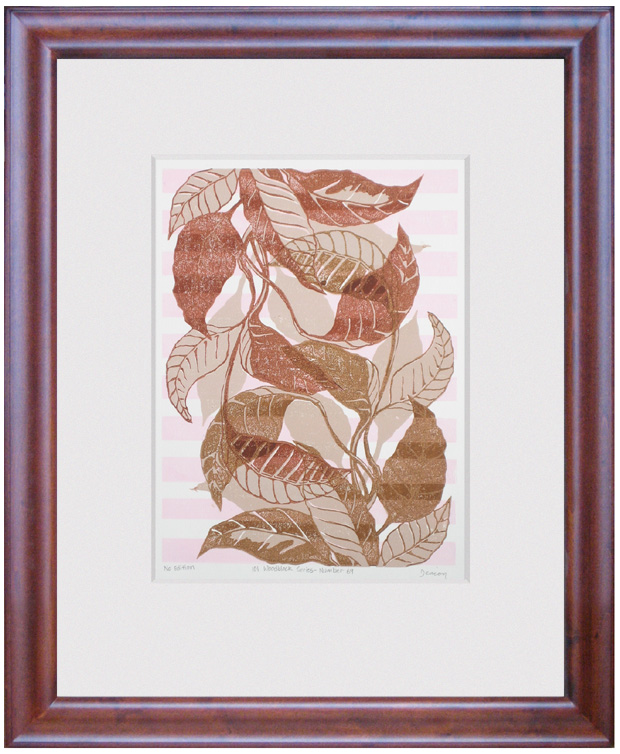
101 Woodblock Series - Number 69 in a 16x20 frame
When you go to the store to buy a frame, bring the woodblock print with you, so you can see how the print looks with different colors and shapes of frames. Some prints will look better with a black frame, others will look better with a natural wood color frame. The only way to know what will work best is to test it out.
The Mat
The tricky part of matting and framing a print is cutting the mat. Unless you have a mat cutter (which is a specialty tool), the easiest way to do this is to go to a framing shop and have them cut a mat for you. In fact, even if you do have a mat cutter, it is easier to go to a framing shop and have them cut a mat for you.
The “Window” of the mat is the empty space in the middle. It is typical to cut the window in the mat a little larger than the size of the image. A good size for the window is 1/8″ to 1/4″ larger than the image on the sides and top, and 1/2″ to 3/4″ larger than the image on the bottom. The extra space on the bottom is to allow the number, title, and artist’s signature to be visible.
101 Woodblock Series - Number 80 in a 16x20 frame
[Note: this is different than how mats for photographs are cut, and the reason why pre-cut mats might not work. Mats for photographs are cut so that the window is smaller than the image, so that the edges of the photo are under the mat. A frame that comes with a pre-cut mat will most likely be cut for a photograph, so the window will be a bit small for a woodblock print. This type of mat can be used, but the edges of the print will probably be covered by the mat, and the number, title, and signature will be covered. If you prefer to frame your print like a photo, however, go for it]
So, what should the widths of the mat be?
The sides are easy, they should be the same, so that the print is centered from side to side.
The top width usually looks better when it is a little wider than the side widths, so add 1/8″ to 1/4″ to the side width to get the top width.
With the 3 standard frame sizes I mentioned above, this will leave the bottom width a bit wider than any of the others, and this is good. Artwork that has been matted always looks better when the bottom of the mat is a bit bigger than the sides and top. It may be just a trick of the eyes, but if you center the print from top to bottom, it will look like it is too low.
For one of the standard 9″x12″ prints sold on this site, here’s a recap of how to cut the mat, in bullet form:
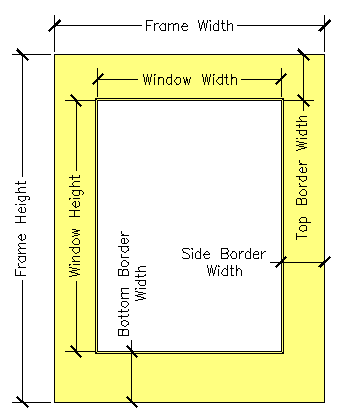
Visual reference of the various mat dimensions
- Add 1/2″to the width of the image, this is the width of the window
- Add 1″ to the height of the image, this is the height of the window
- Subtract the width of the window from the width of the frame and divide this number by 2. This is the width of the mat on either side.
- Add 1/8″ to 1/4″ (your preference) to the width of mat on the side. This is the width of the mat along the top.
- Using these mat widths and the window width and height, the bottom width will automatically be a little bigger, just like it should be
(Wow! It’s almost like I planned the size of these prints so a mat can be cut that makes them look great in standard size frames!)
The last thing that you have to consider is the color of the mat. White or off-white usually looks good. The color of the mat should add to the visual appeal of the woodblock print, not distract from it. This may just require judgment.
If you are getting a mat cut at a frame shop, they may be able to offer advice on what color mat will look best. It is, after all, their job to know this stuff.
When in doubt, however, go with white, or a very light off-white.
So now you’ve got a frame, a mat, and a print. To put it all together, tape the print to the back of the mat. You only need to put tape along the top of the print, this will keep the print from warping if the paper expands or contracts (usually it won’t but humidity may cause some small changes).
If you ask nicely, the guy or gal at the frame shop where you got your mat cut may give you a couple pieces of archival tape. This stuff is designed to last, and to not have any acids, which may change the color of the paper. The paper and inks are archival quality, so with archival tape and a nice mat, it should last a very long time.
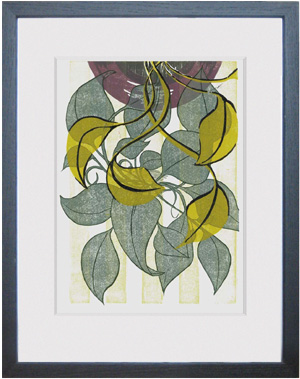
101 Woodblock Series - Number 2 in 14x18 frame
The mat goes against the glass of the frame, and the frame will probably have a sheet of cardboard or Masonite to go behind the print and mat.
Now it’s ready to hang on your wall!
Framed and Floated Prints
Floating prints in a frame is just as in depth as matting and framing a print. Also, nearly all standard frames available for sale are not designed to float a print. A special frame is required. In a floated print, the print is attached directly to the backing, usually an uncut mat board. This backing is set back from the glass with a spacer that is built into the frame. When framed in this way, the print seems to “float” in the space between the glass and the backer. The entire paper is visible.
Since framing prints like this requires a specialty frame, I wrote a separate page about float-style framing of woodblock prints.