I have to think about color extensively as I am working on a print.
Yesterday’s post about color choice is continued in this post today. In yesterday’s post I mentioned how color can be used to resolve other colors together, and make them work well and look good together.
Examples of Prints in Progress

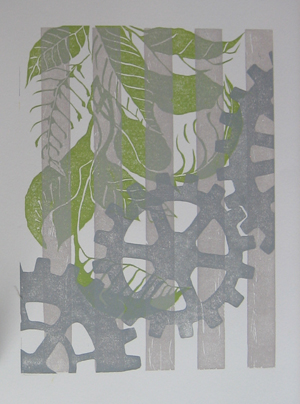
This print can easily be resolved with a darker green
I have a few prints that are in various stages of completion, one of them has an obvious resolution, one is still making me think. In this section I am going to discuss how I think about color in these prints, and what I think is needed to resolve the colors I have printed so far.
The print on the left is waiting for 1 last color to be printed, and I think that it is pretty clear what that color should be. I plan to print a slightly dulled down (ie. less saturated), transparent forest green color. That color should make this image pop together.
The trick to this image is going to to find a color that is rich enough, but not so rich that it overpowers the other colors already on the page. The 3 colors on the paper so far are not strong in value and saturation, so a very saturated color might visually dominate these colors, and make them appear weaker, and lose definition. A strong color would draw all the attention, and the other colors would appear very gray in comparison.
A color without enough saturation, on the other hand, will make the entire image appear bland, and the definition will be lost because nothing will stand out. If the 4th color is as dull and grayed out as the first 3 colors, then the entire image will appear to be a dull gray mess, and nothing will catch the eye. Everything will blend together, nothing will be interesting.
A quick aside
I wasn’t going to discuss this in this post, but it came up as I was thinking about the above print, because I noticed another completed print that seems to contradict what I said above.

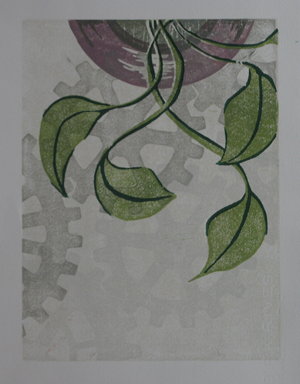
The vibrant dark green works because it is used sparingly
Interestingly, the issue of matching the value of the other colors is more and more of a problem when the area that ink will cover becomes larger and larger. In the previous example, the 4th block will cover a large portion of the paper with ink. This makes the color choice much more important.
If the block applied a smaller area of ink to the paper, then a color with a much stronger value could be used. The color will not overpower the others because there is less of that color on the paper.
The print on the left demonstrates how a stronger color can be used when used sparingly. The first four colors that were printed are all very close to gray, their value is all very low. A strong color could easily overpower all of these subtle colors.
I printed the final block, the little bits of definition of the leaves, with a very saturated green color, straight out of the ink can. I didn’t thin the ink or mix in other colors to tone down the vibrancy of the color.
This choice worked well for this image, and the small, vibrant bits of color make the image come to life in a way that it didn’t before this vibrant color was printed. If the final color covered more of the paper, however, this strong green color would start to overpower the rest of the colors because it would become too dominant.
The fact that there are just very small bits of this color allow me to use a color so vibrant.
Back to the Regular Program
The last block I have to discuss today is another print that is in progress, and that I have created a bit of a problem with.

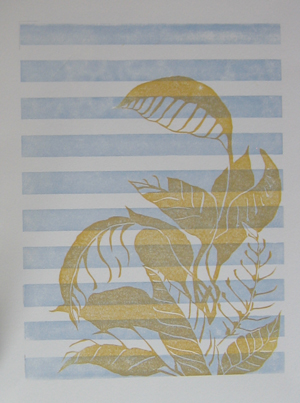
These two colors will be difficult to resolve
The block on the right has only the first 2 blocks printed, but I used 2 very different colors on this print so far. The light blue, and the dirty orange color do not look very good together as they are. A third color is needed to tie everything together, and visually connect these two colors.
Even though these two colors are not that saturated, they look more saturated than they are when placed together. The blue and the orange are compliments (opposite on the color wheel), so they make each other look brighter. Because of this, I will have to mix a color that is a little more saturated than I might guess, because I have to match the apparent saturation of these colors, rather than the actual saturation.
I’m not sure exactly which color I will print on this block next, but it will probably be in the brown family. The trick is going to be to pick the right shade of brown to make these two colors come together. It would be just as easy to mix the wrong color brown as it would be to mix a color that makes the blue and the orange look good.
Last Thoughts
It turns out that I think about color a LOT. Color choice is usually the most difficult part of the printmaking process for me.
If you missed yesterday’s post, click here to check it out. Leave a comment below and let me know if this was interesting, confusing, or anything alse.
Tags: Color, Saturation, Value
That last one will be tough.
.-= Dave Doolin´s last blog post ..Whose in Charge Here? You, or your blog? =-.